
Last Updated on July 23, 2021
Learn how you can easily create a dynamic catalog on WordPress using Toolset and Stackable!
In recent years, internet traffic has grown exponentially. With that, web designers and developers have made significant improvements to the way users experience the internet. One of which is the shift from static websites to the widespread use of dynamic content.
Static websites are designed using fixed elements. It gives a uniform experience for all website visitors. Some may argue it’s less effective than dynamic websites but that is subjective, of course. For those that just need a platform to present basic information, static websites may be the practical choice.
On the other hand, for those that want to enhance their websites, you may want to look into adding dynamic functionality to your website. When you use dynamic content on your website, you provide a personalized experience for your visitors. Additionally, it’s easier to manage as you eliminate the risk of messing up the code-work of your website.
Want to make the shift to creating dynamic websites on WordPress? Our integration with Toolset makes it easier to create dynamic content. Toolset and Stackable are two powerful WordPress plugins that extend the functionality of the WordPress block editor. If you’d like to see it in action, keep reading!
How to Create a Product/Services Catalog Using Stackable and Toolset
With Toolset, you are able to create custom post types (CPT), fields and taxonomy to input just about any type of content that your website needs. Then using those in combination with Stackable, you can create beautiful templates, archives, and forms.
In this example, we’ll be showing you how to create a dynamic catalog on WordPress by creating a services catalog for a salon. However, keep in mind that this will not be an eCommerce website.
1. Create a custom post type for our service
Go to Toolset → Post Types, then click Add New. Fill in the fields for the singular and plural name of your post type. By filling these in, your slug name will be automatically generated. However, should you choose to assign it a different slug name, you can do so by typing in the input text field. Make sure to substitute spaces with dashes (-) or underscores (_).
Here, we’ll be labeling our CPT as “Services”
Additionally, you can opt to add a description and change the icon.
Click Save Post Type and you have your first custom post type!

2. Create custom fields
Go to Custom Fields, which you can access by clicking Custom Fields on the menu panel on the left side of your WordPress backend. These custom fields are where we can input the information that will be associated with our services.
On the modal prompting to choose a custom field group, select Post Fields. After, you will be required to label the field group and optionally add a description.
Next, click Add New Field and a modal will appear. Select the field types that you will need for your content and fill in the information. For this tutorial, we’ll be using some basic information such as the following:

3. Add your content
Now, we can add our content! Hover over your new post type, then click Add New. Your custom fields should appear on the bottom. This is how the block editor will appear:
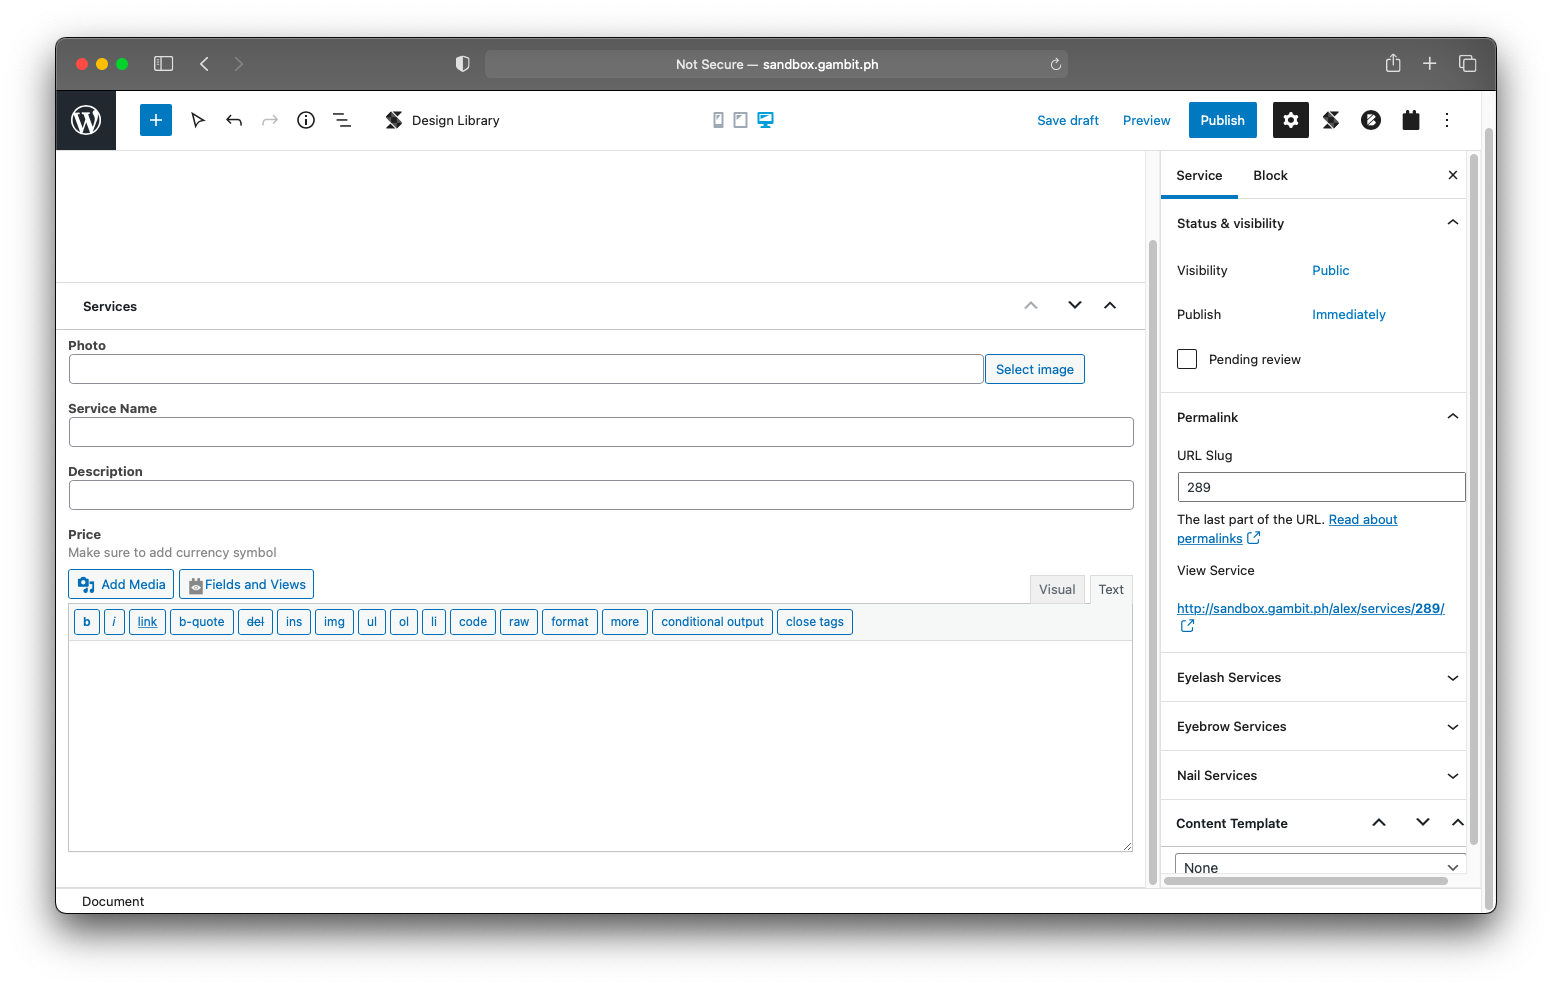
Fill in the fields with the information that we need for each service. Make sure to publish each one!

After filling out the content, this is how the post type list will look like:

4. Design the template for the CPT
Now let’s design a template for our custom post type so we can display the information we’ve put in. The template we create will automatically apply for each entry of our CPT.
From your Toolset dashboard, click on the Create Template button on the row of the CPT we’ll be designing.
Now we just need to add the blocks for our template!
Stackable gives you a few pre-made designs that are grouped together in UI Kits. Since we’ll be designing for a salon, Stackable’s Peplum UI kit would work well. We can access these pre-designed blocks by clicking the Design Library button on the toolbar.

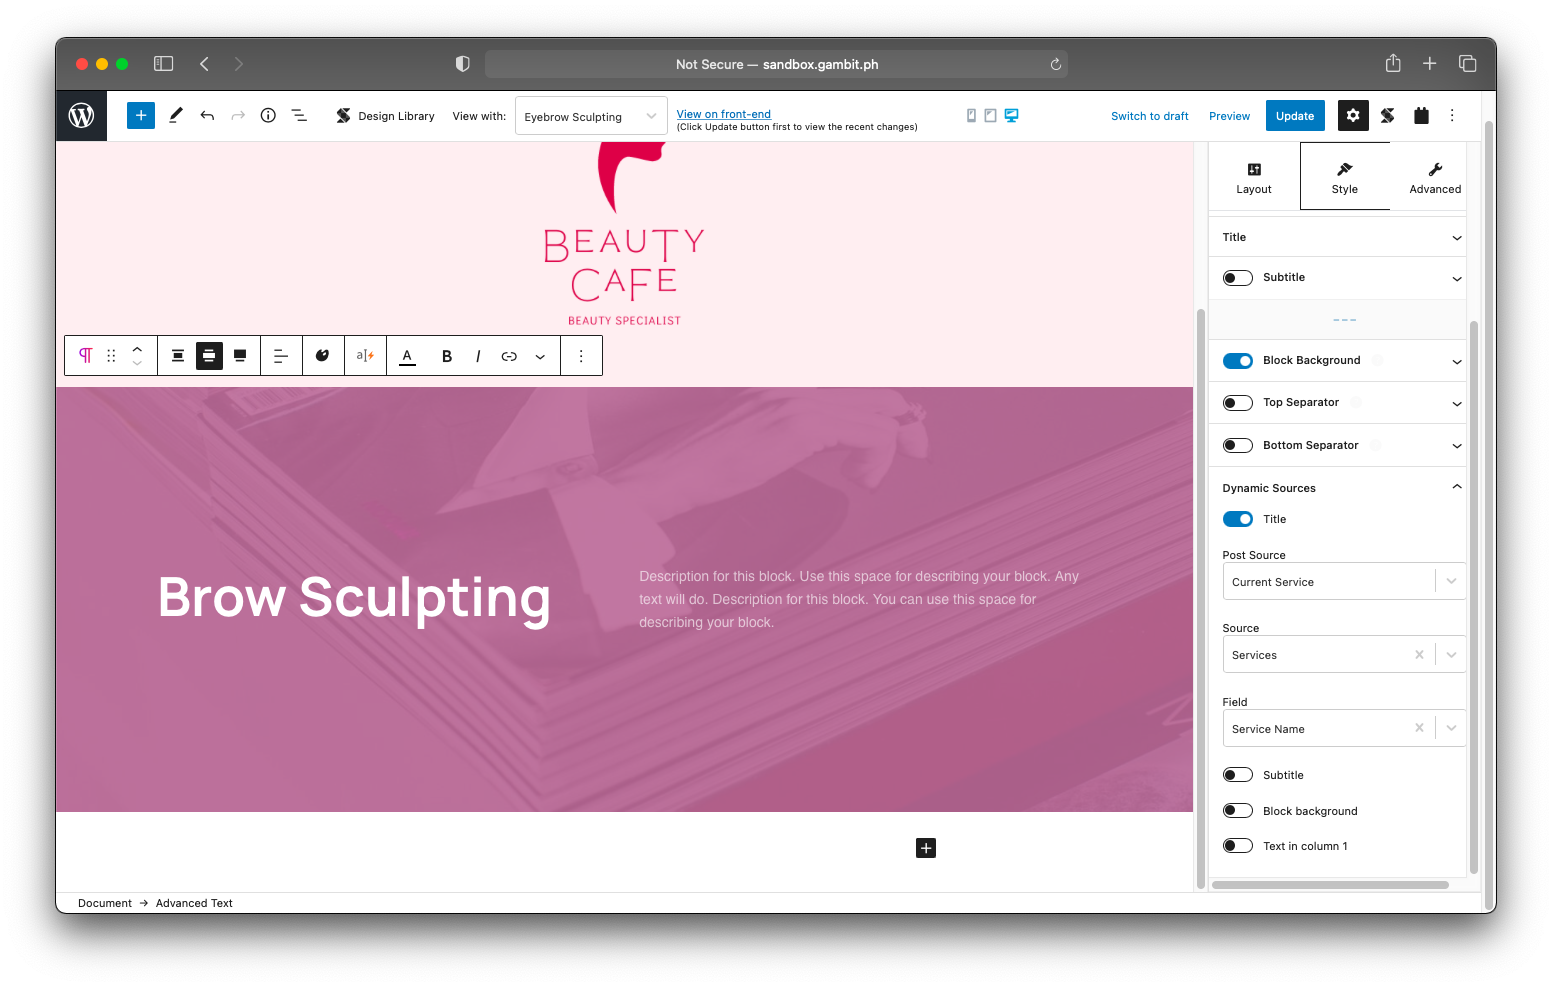
Here, I’ll use the Advanced Text block to display the Service Name. In the inspector, I turn on dynamic sources for the Title. To fetch the information, select Services in the Source drop down menu, then Service Name in the Field drop down menu. I leave the text blank so that it won’t appear in the frontend.
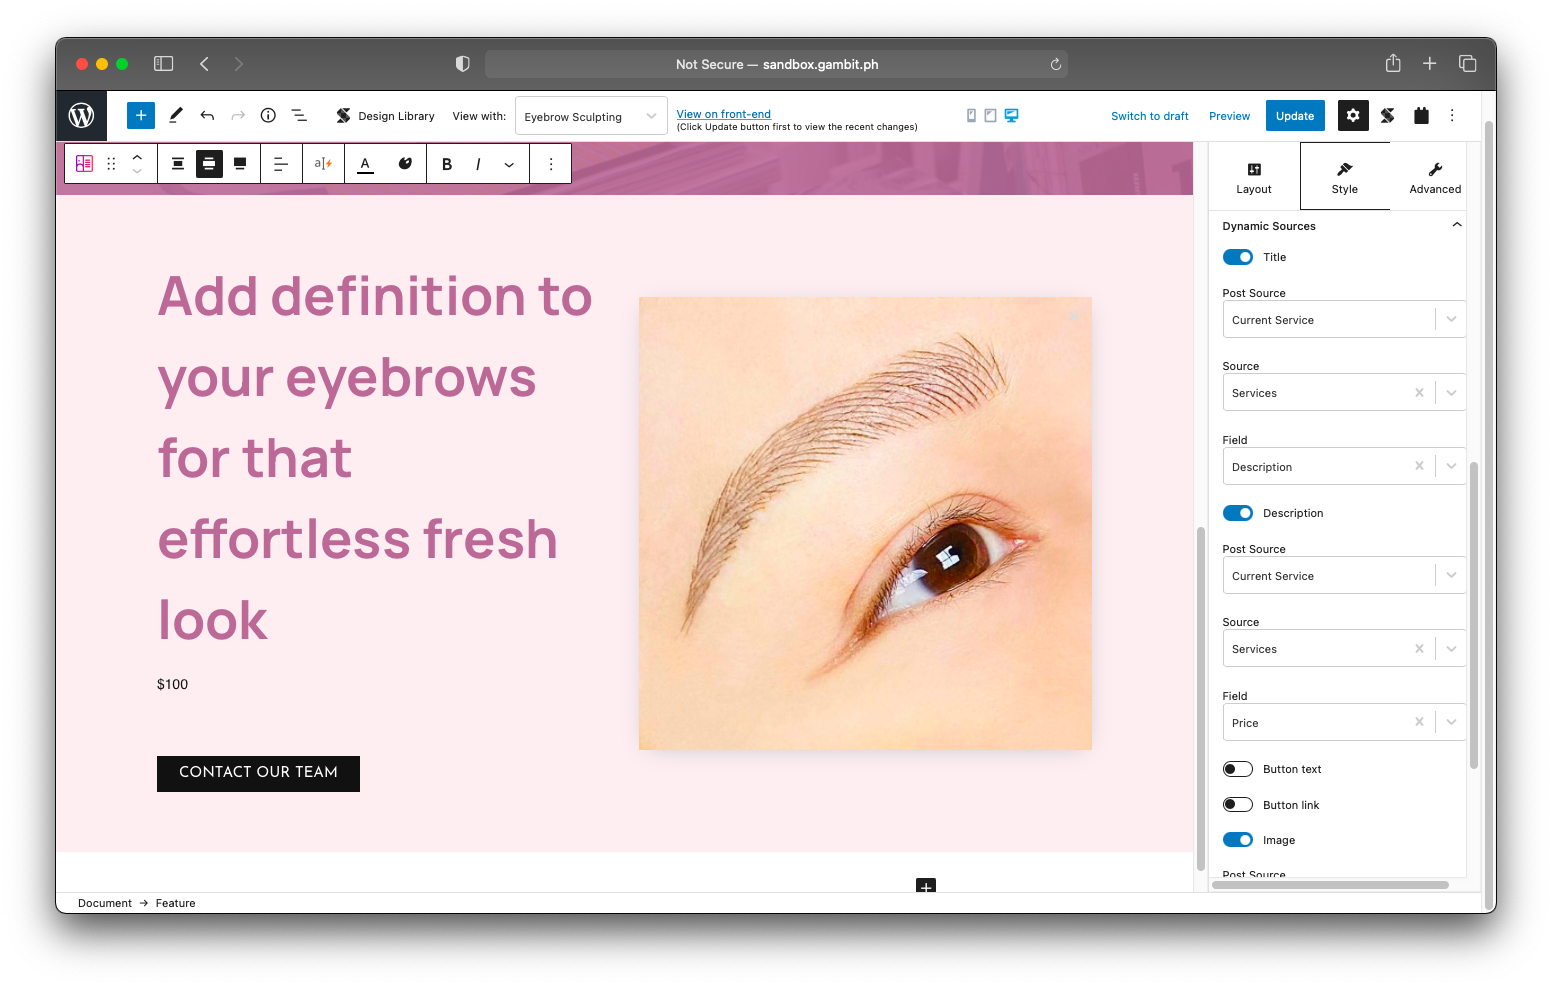
To display the rest of our information, let’s use the Feature block. We turned on the dynamic sources toggle for the Title and Description, and used the Service Description and Price as sources respectively. Then, we used the Photo as the source for the Feature block’s image.
Now let’s make our finishing touches so our template looks clean and cohesive. This is the finished look of our template:
5. Design the archive for the CPT
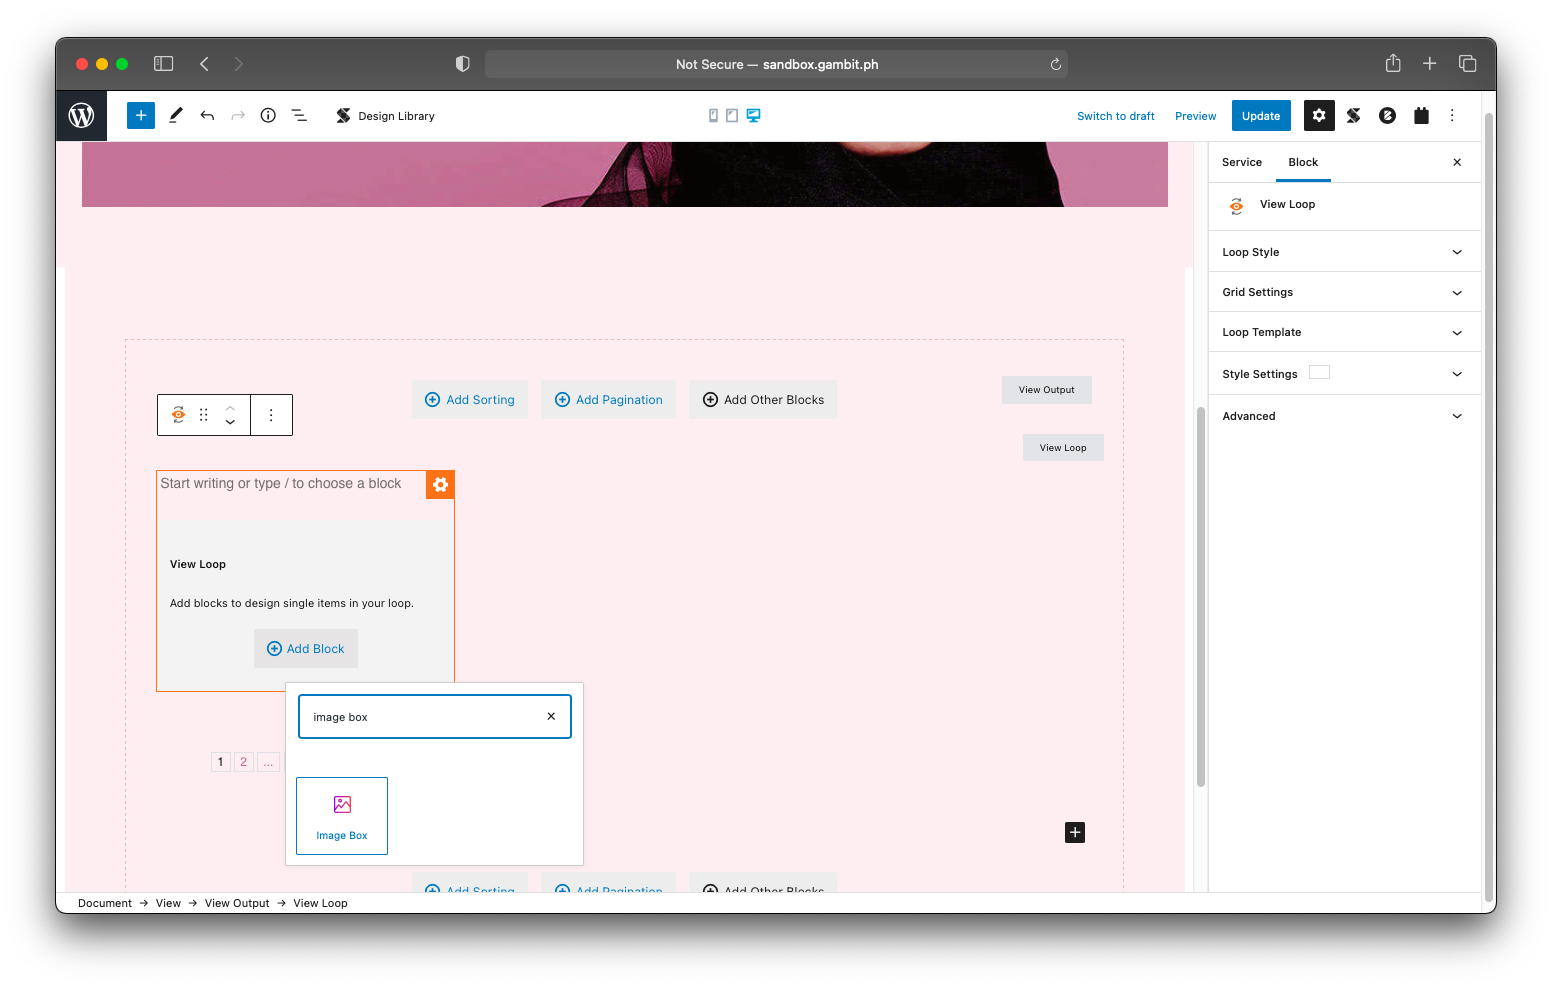
Finally, let’s create an archive to display all our posts for this post type. On our page, let’s add Toolset’s View block. This is the block that displays and loops our custom posts.
Next, type in a name to label the view. Click Create View. Keep the default settings as it is, then click the Next button.
Then, among the options, select the custom post type that we’ll be displaying.
Once we’re ready to add a block within Toolset’s view block, let’s add Stackable’s image box block.
Now, let’s assign the CPT’s Image field to the image element of our Image box block using Toolset’s Dynamic Sources accordion.

Let’s fetch the Services Name field for the title of our image box block, then description field for the description element.

There you have it! We have built our services archive in just a few steps. Our final result will look like this:
Start designing dynamic content on your own website!
The Toolset and Stackable integration is available for both free and premium users of Stackable. Just make sure that your Toolset license is activated and you’re all set! Download Stackable now and subscribe to Toolset’s package!
Disclaimer: This article contains affiliate links to products. We may receive a commission for purchases made through these links.