
We’re thrilled to announce Stackable’s newest addition to its lineup of custom WordPress blocks: the Timeline block. This new update v3.11.0 also comes with some performance updates that should bring memory and loading improvements!
The Timeline Block
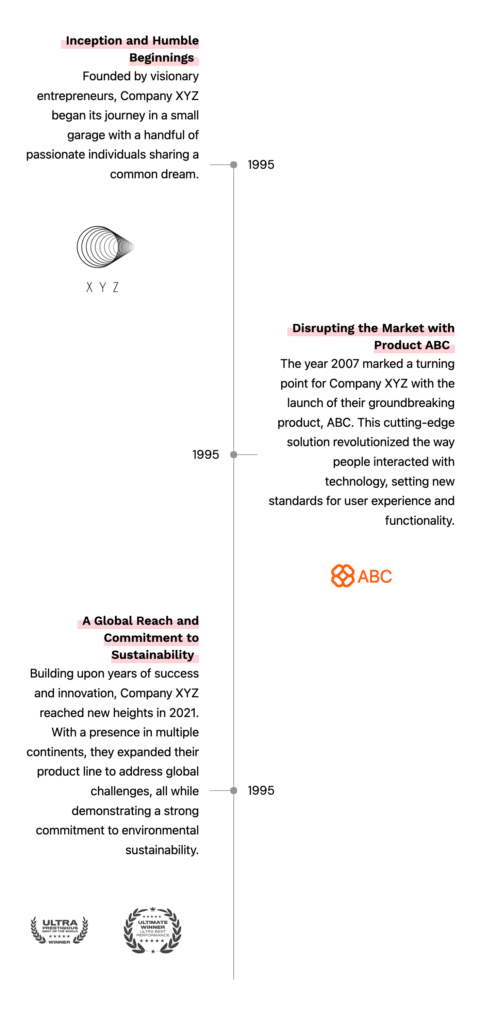
Timelines are a great visual tool to convey sequences, histories, and progressions. Whether you’re detailing the history of your company, highlighting project milestones, showcasing a sequence of events or even steps to a process, timelines make it easy for readers to follow along.
Stackable’s Timeline block is the perfect tool if you want to make timelines, roadmaps, or a step-by-step guide on your website. Its versatility makes it easy for you to create any type of timeline layout that you might need for your content.
The anatomy of the Timeline block is simple – the Timeline is the parent block and it has an inner column that by default includes the Text block.

You can add any block inside the Inner Column; whether it is a Heading block, an Image, or the Icon Box block, you name it!
You can even build a post timeline showcasing your latest posts using Stackable’s dynamic content feature.
The date that is added to the block is just a placeholder; you can type in any text you want here. It could be any date you want, it could be step numbers, or you could also just leave them blank.

How the Timeline blocks work is that you will have to add multiple “Timeline blocks” to create an actual timeline. When grouped together, their vertical lines automatically connect together like in the video below:
Additionally, the Timeline block’s line that connects the points has an accent color that highlights downwards as the user scrolls the page.
Finally, Stackable’s Timeline block is also responsive. The Timeline block adapts to the screen you’re viewing it from, whether it’s from a tablet or a mobile device.
The Timeline Block’s Design Options
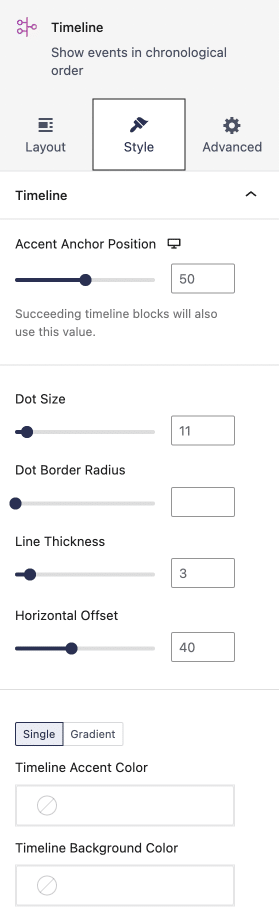
The main design controls will be found when you select the entire Timeline block. In the Inspector, go to Style > Timeline. In this panel, you can find the following controls:
- Accent Anchor Position – This determines the starting point from which the timeline’s accent begins to fill
- Dot Size – Adjusts the dimensions of the dot that marks each individual point or event on the timeline
- Dot Border Radius – This rounds the dot’s edges. A larger radius will result in more rounded dots, while a smaller radius will produce sharper, more defined corners (e.g. if the value is set at 0, the dot will appear as a square)
- Line Thickness – adjusts the width of the timeline itself
- Horizontal Offset – This option lets you shift the timeline content closer or farther from the center
- Timeline Accent Color – Determines the color of the accentuated parts of the timeline. You can also opt to use a gradient.
- Timeline Background Color – Sets the base color of the timeline
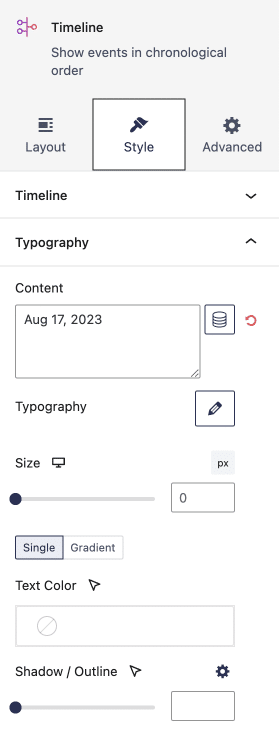
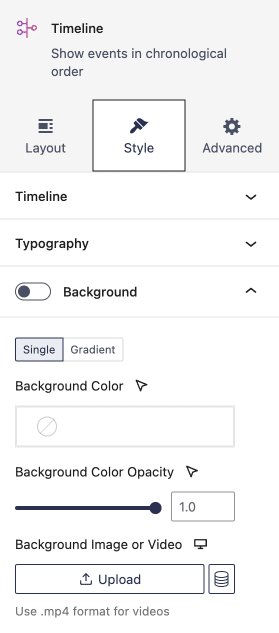
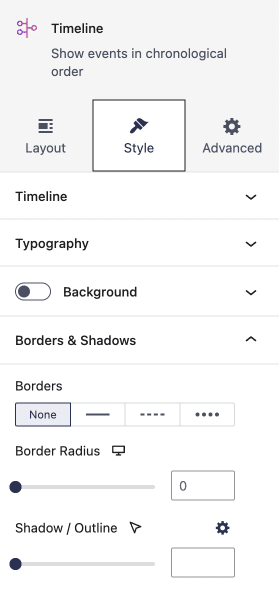
The Style Tab also includes Typography settings, Background settings, and Borders & Shadows options.
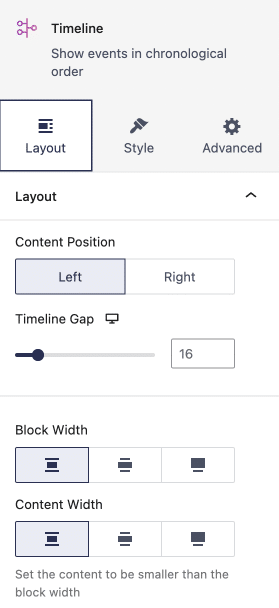
To tweak the block’s layout, you can navigate to the Layout tab > Layout panel. Here, you’ll find two Timeline block-specific options:
- Content Position – allows you to choose if the content appears on the left or right side of the timeline
- Timeline Gap – which you can use to modify the spacing between the content and the timeline itself.
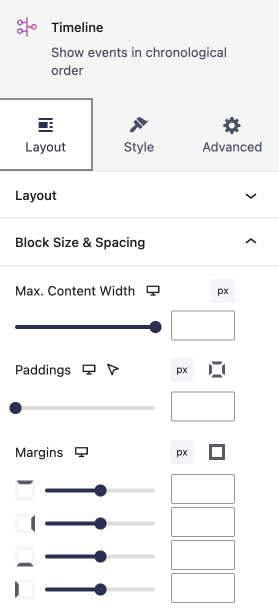
The Layout tab also has the usual block size and spacing controls such as the maximum content width, paddings, and margins.
How to Create a Timeline with Stackable
Creating an eye-catching, informative timeline on your website is now just a few steps away with the Stackable Timeline Block. Here’s how you can craft your unique timeline:
1. Add the Timeline block
To create your timeline, start by adding your first Timeline block. You can find the Timeline block in the Inserter, the plus (+) button on the toolbar of the WordPress block editor.
One Timeline block represents a “point”—this could be an event, a step, or even a post from your WordPress blog. For this tutorial, we’ll create a simple timeline showcasing a sample company’s milestones.
2. Customizing the Timeline block
Tailor the Timeline Block to resonate with your brand or the theme of your website. Adjust colors, fonts, spacings, and more to make it uniquely yours.
3. Add Your Content
You can use any block to populate the Timeline block. In the video below, we’re simply using the Text block and changing the placeholder date to a year.
We also turned on the background settings for the inner column of the Timeline block and added an image, with a gray overlay to lessen its opacity; keeping the text readable.
4. Repeat
To build a whole timeline, you will have to add the Timeline block again. However, note that simply adding a new Timeline Block won’t inherit the styles from your initially designed block. To maintain consistency, you might want to copy and paste the styles from your first block or just duplicate the first block you designed.
In our example below, we just duplicated the initial Timeline block and changed the content for the following ones.
Other Updates
Other than the Timeline block, this release also includes a lot of performance improvements in the backend and frontend of your website. Expect Stackable to use less server memory across the board.
Here are some other bug fixes and improvements that comes with Stackable v3.11.0:
- New: Various performance optimizations, lesser memory usage and better script loading
- New: Page now scrolls to the opened Accordion if it’s not in the viewport
- New: Added a tip when incorrectly using a Google Map in a lightbox
- New: Added some new getting started videos
- Change: Removed settings wizard
- Fixed: Normal or centered block widths are not visible in the editor in WP 6.3
- Fixed: Blocks were not being loaded in the Customizer for classic themes
- Fixed: Blocks can encounter an error when dragging inside or from a pattern or template
- Fixed: Global colors and typography not showing in the editor if Content Editing Mode is enabled
- Fixed: Custom Fields admin menu UI
- Fixed: Picking an icon from the icon picker inside the editor area doesn’t work
- Fixed: Block link now correctly occupies the entire container block if it has a background
- Fixed: Removed ReactDom.render console error messages
- Fixed: Native spacing tabs appear in WP < 6.3
- Fixed: Design Library block cannot be selected
- Fixed: Columns content max width unit resets after saving
- Fixed: Icon gap responsive settings resets after saving
- Fixed: Carousel now uses passive listeners to improve scrolling performance
- Fixed: Sometimes inactive tabs can still get mouse focus
Conclusion
In this article, we’ve delved deep into the features of Stackable’s all-new Timeline Block, as well as the performance updates that will give you a better user experience. We invite you to experience these new features and improvements firsthand. Update your Stackable to the latest version today and elevate your website’s content to new heights!
Let us know what you think of this release in the comments down below 🥳