
Every website has a goal–whether it’s to create more leads or generate sales. To achieve these goals, websites often implement marketing campaigns. One tactic that marketers use for these marketing campaigns is creating countdown timers.
Countdown timers in web design are digital timers that display the remaining time until a particular event or deadline. In this article, we’ll discuss how you can use countdown timers to boost your marketing campaigns.
Why use countdown timers in my campaigns?
Countdown timers are a great tool for marketing campaigns if used properly. Research has shown that using a countdown timer can increase conversion rates. Here are some reasons why countdown timers can make your marketing campaigns more effective:
Sense of Urgency
Having a countdown timer encourages website visitors to take action before time runs out. It will give them motivation to fulfill a goal you’ve set for your website, whether it is to sign up for a newsletter, make a purchase, or completing an action that will be beneficial to the website visitor and your business.
Increase Engagement
Countdown timers can also help to increase engagement with your marketing campaign by creating a sense of excitement and anticipation. You can do this by promising a valuable opportunity by the end of a countdown. As an example, when you have a timer counting down until the launch of a product or a sale, it may have your website visitors eagerly waiting for the countdown to reach zero. This may cause them to explore your website more while waiting for the end of the countdown.
Increase Conversion
By leveraging scarcity, countdown timers can ultimately lead to an increase in your website’s conversion rates. Customers will more likely take action when they feel that they must act quickly to avoid missing out on a valuable opportunity. When you create a sense of exclusivity, it will encourage customers to make the desired action before a timer runs out.
What type of marketing campaigns can i use countdown timers for?
There are a variety of marketing campaigns that you can use countdown timers for. However, it’s important to make sure that the timer is relevant to the promotion or event and that it is not overused, as customers may get used to the sense of urgency it creates. Here are some types of marketing campaigns in which countdown timers can be effective:
Limited-Time Promotions
You can take advantage of countdown timers for limited-time promotions, flash sales, or seasonal offers, like say during a Black Friday or New Year’s Eve sale. By using countdown timers for limited-time promotions, you can increase the number of purchases made during the promotion period.
Product Launches
You can create a countdown timer for a product launch or even a website launch. By starting the countdown several days or weeks before the launch date, you can generate buzz and excitement, and encourage customers to sign up for email alerts or follow your social media channels for updates.
Event Registrations
Countdown timers can also be effective in promoting events and encouraging registrations. By highlighting the number of days or hours left until the event, you can create a sense of urgency and encourage customers to register before it’s too late.
How to create a countdown timer?
It’s important to choose the right countdown timer for your marketing campaign. There are many options available, especially when you’re a WordPress user–from free plugins to paid services, so it’s essential to choose a countdown timer that is easy to install and customize for your website.
We suggest checking out Stackable (of course). It’s the ultimate block plugin for the WordPress editor. Our very own Countdown Block has a lot of design controls that make it easy for you to match it with your website. Let us show you how easy it is to add a countdown timer and customize it to fit the rest of your website.
Here’s an example of a Pricing page without a countdown timer. It has all the typical sections of a Pricing page but if you notice in the video below, it’s currently having a sale. It’s not really obvious that it’s for a limited time only and a website visitor won’t have any information on when it will end.
We should first set a clear goal. The goal could be to increase sales, gain more subscribers, or create brand awareness. But for this page, our goal is to increase sales, to do that, we must create a sense of urgency.
We want to place the countdown timer strategically. An area where it is visible and obvious to customers but where it will not interfere with the customer’s shopping experience. Let’s place it at the top, right before the Pricing section.
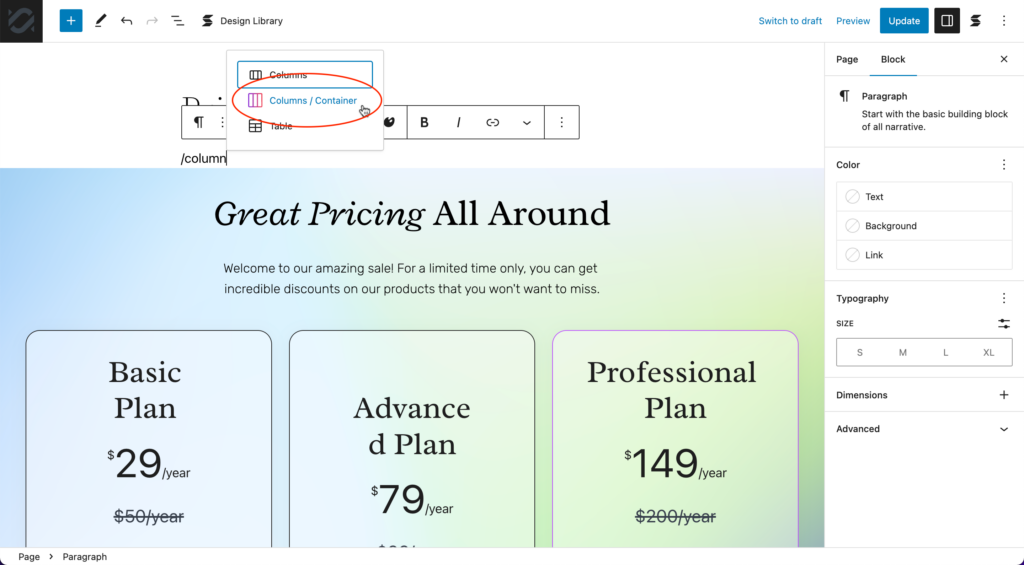
Let’s first add a Columns / Container block at the top of the Page Content.
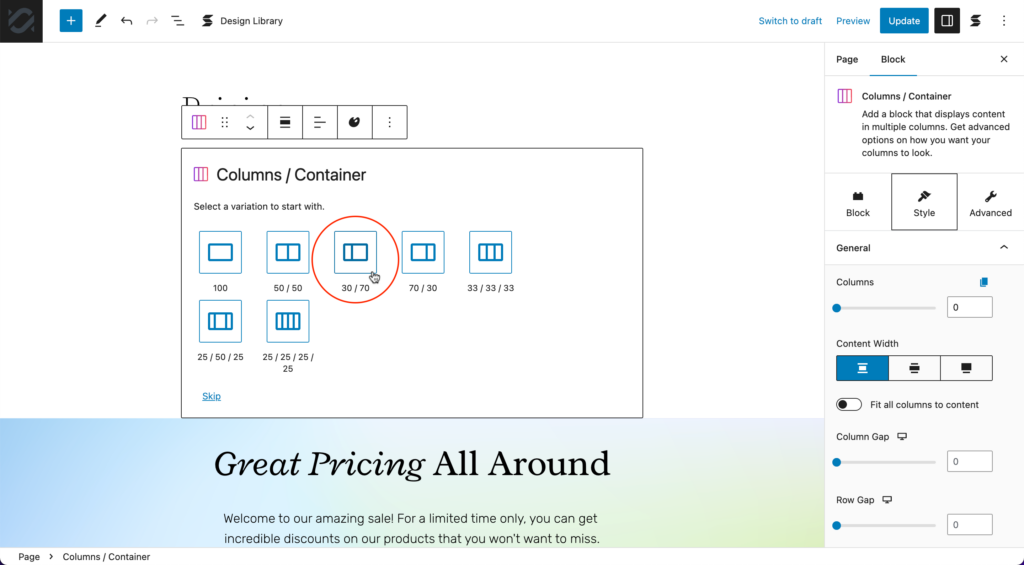
In the Layout picker, we’re choosing the 30 / 70 option where there will be one inner column that takes up 30% of the page width, and another taking up 70% of the page width.
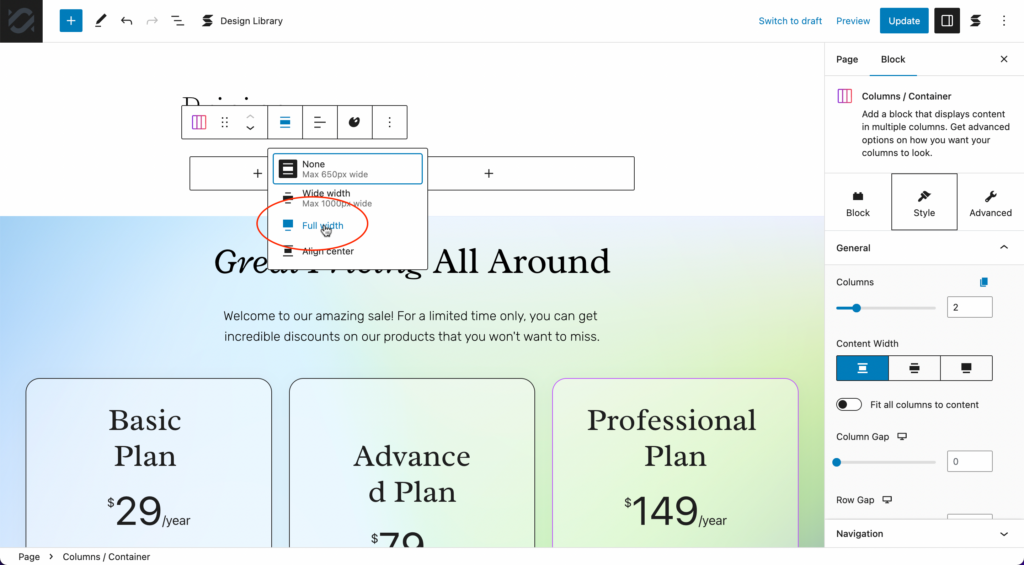
Now, let’s make the whole Columns / Container block full width.
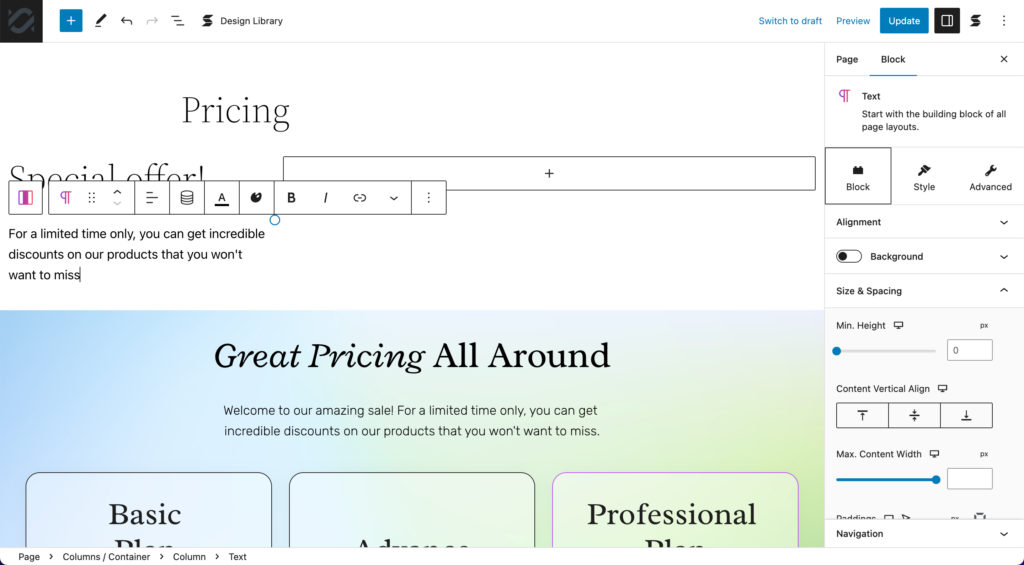
Now, we’ll add in some content on the leftmost column. These are added using Stackable’s Heading and Text blocks. For the copy, it’s important to use persuasive language to motivate your customers to act quickly. For example, “Don’t miss out!” or “Last chance to buy!”. So we made sure to include that in the copy of our countdown timer section to cause some sense of urgency.
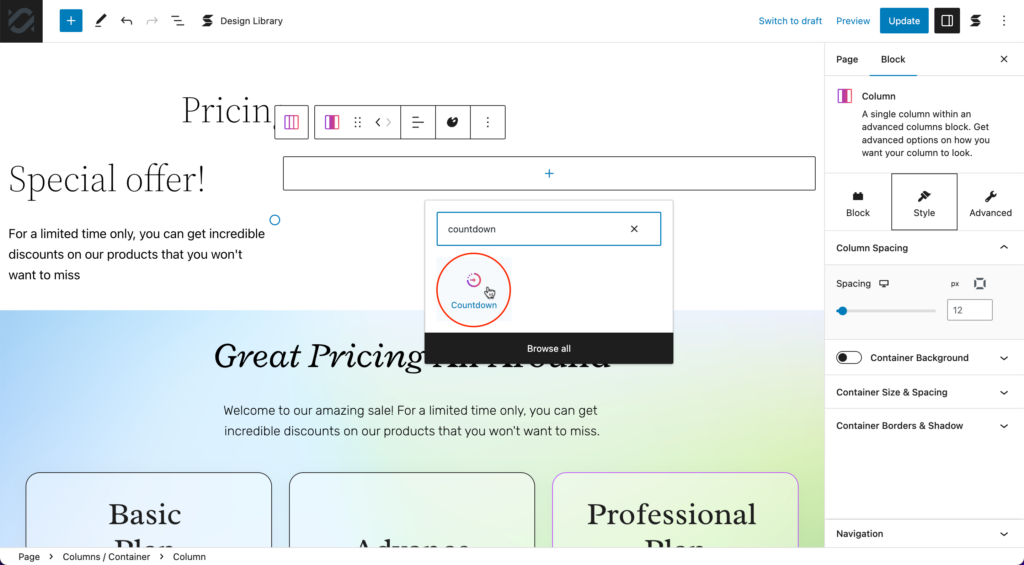
After that, on the rightmost column, let’s now add the Countdown block.
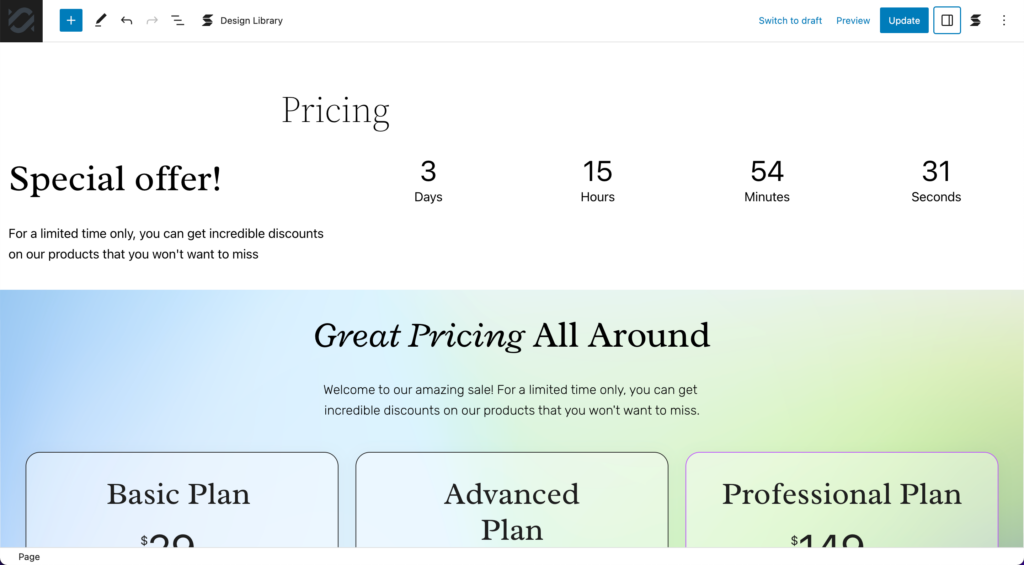
Here is how it looks like so far! It looks pretty bland and doesn’t really match the website’s design and aesthetics yet. So we should customize it a bit more.
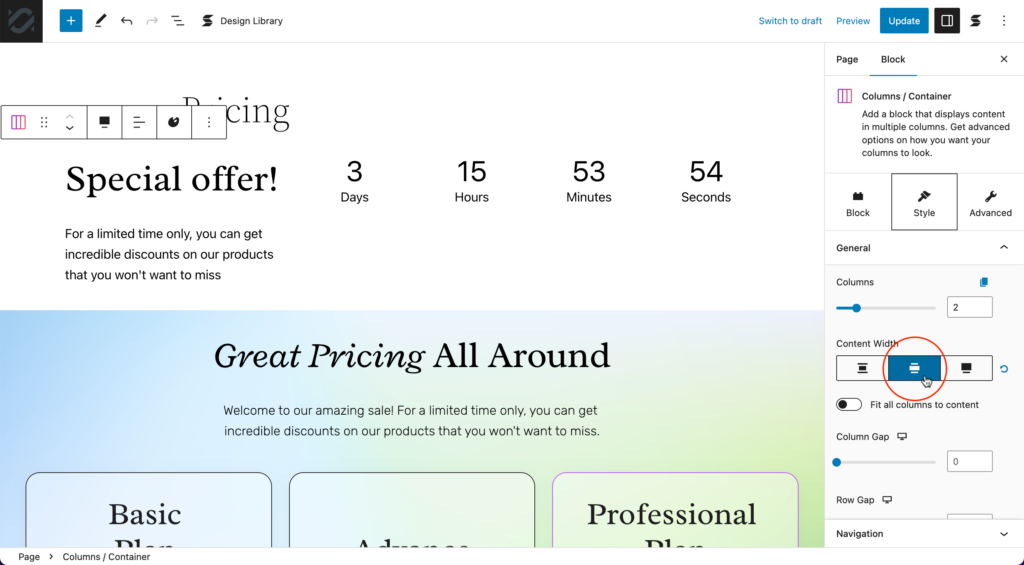
First, let’s make the block’s content Align Wide by selecting the middle option of the Content Width. You can find this option in Style > General > Content Width.
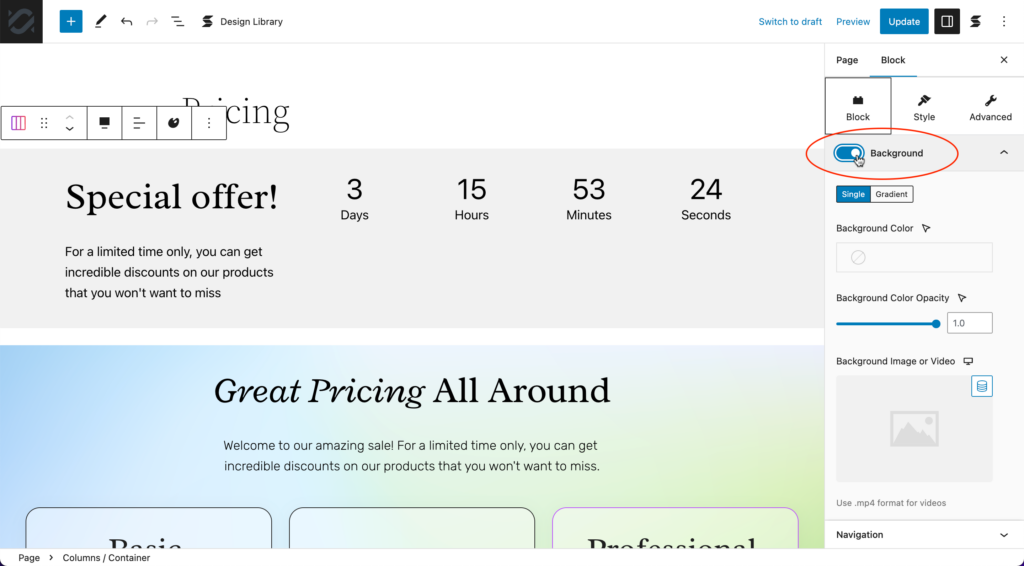
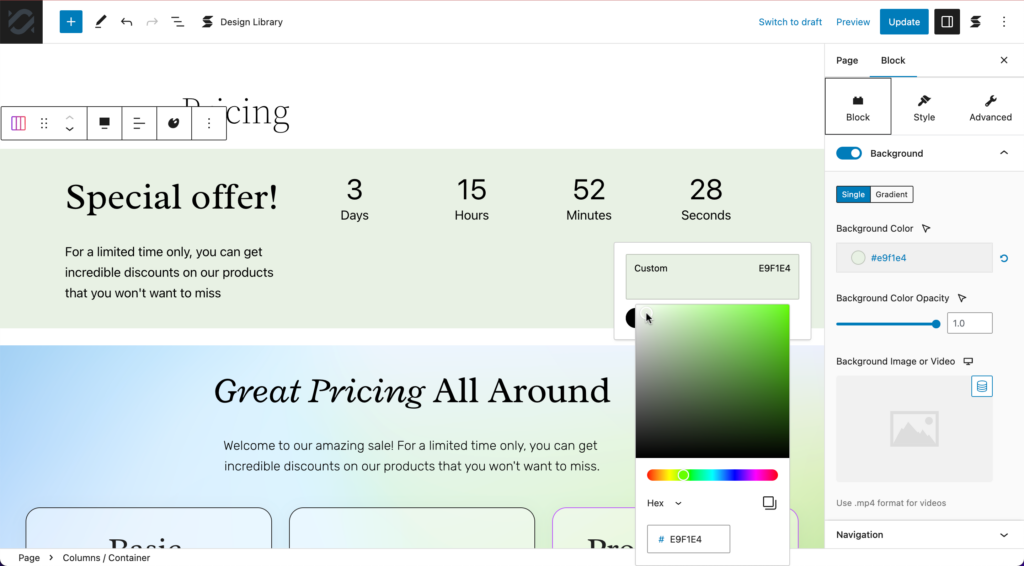
Now, let’s add a background to our block. While with the whole Columns / Container block selected, go to Block > Background and click the toggle to turn it on.
Now, let’s add a color to this whole block using the Background Color control. We’ve selected this custom minty green in the color picker.
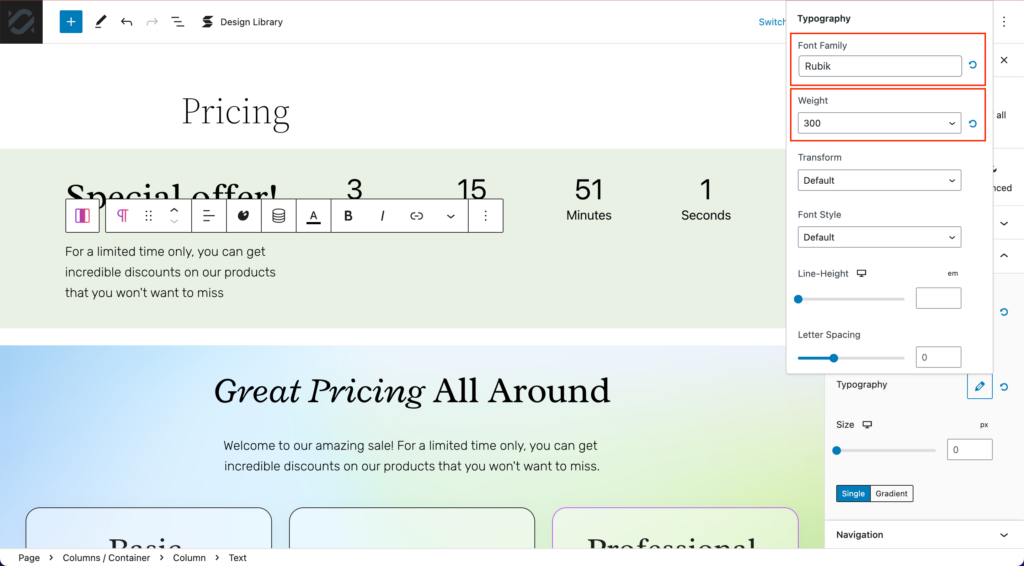
Now, let’s customize the text inside the left inner column. We’ve used the Rubik font for the Font Family and set the Font Weight to 300.
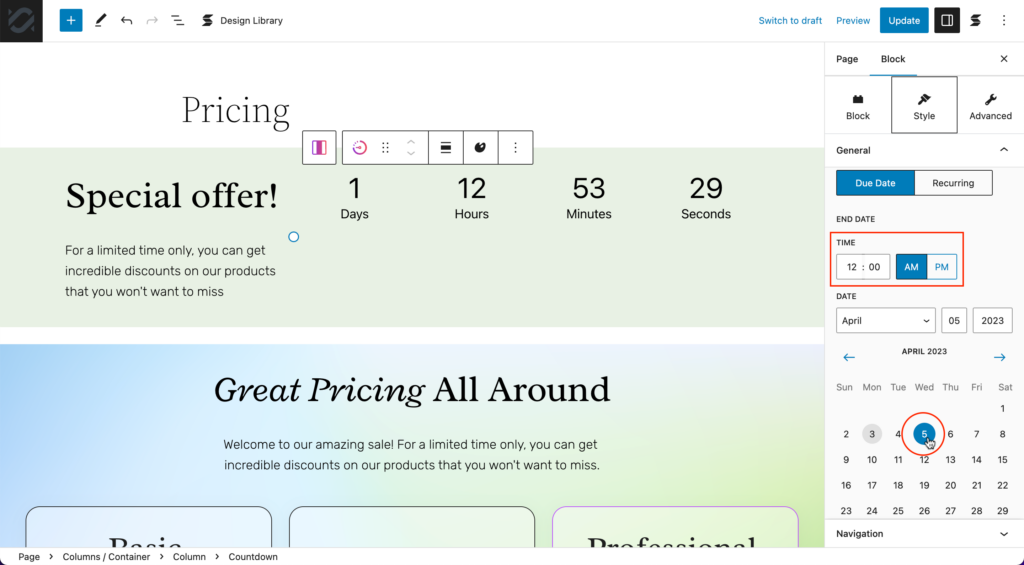
Once that’s done, let’s move on to designing the countdown block. Under the Style Tab, you will find various Settings panels, and the first one is the General panel. It is where you will be able to select what date you want the timer to end. Here, we’ve selected April 5, 2023 and the time to 12:00 am.
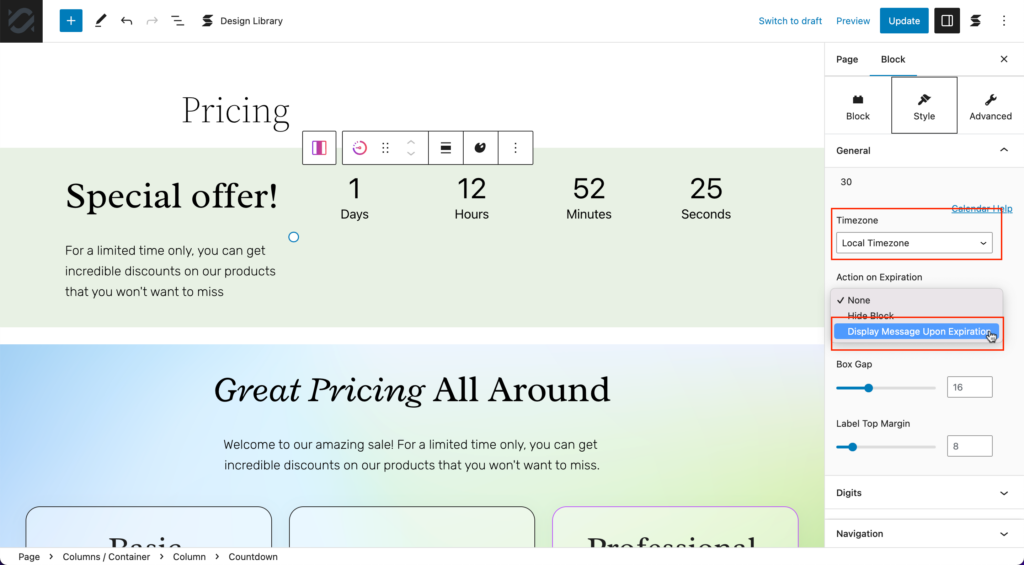
Scrolling down the General panel, you will find the control where you can set the timezone the timer will follow. We’ve selected the Local Timezone option so that it follows the timezone that the user is on, wherever they are in the world. We’ve also set the Action on Expiration to Display Message Upon Expiration so that when the timer ends, we are able to display a message for the website visitor. We’ll add that message later on.
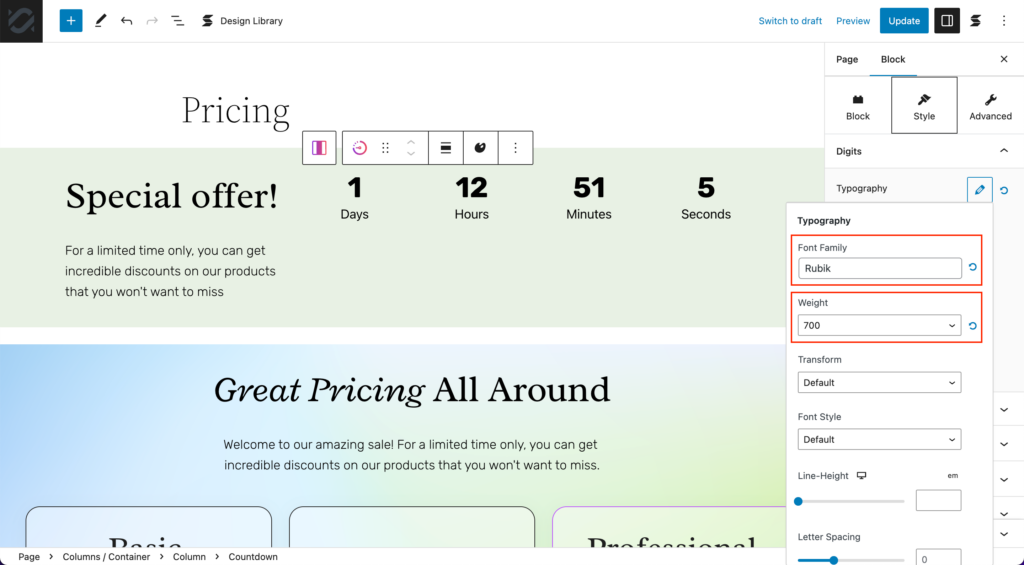
The next panel in the Style tab of the Countdown block is the Digits panel where we will be able to customize the numbers in the countdown timer. We’ve set the Typography settings to Rubik font, and the weight to 700.
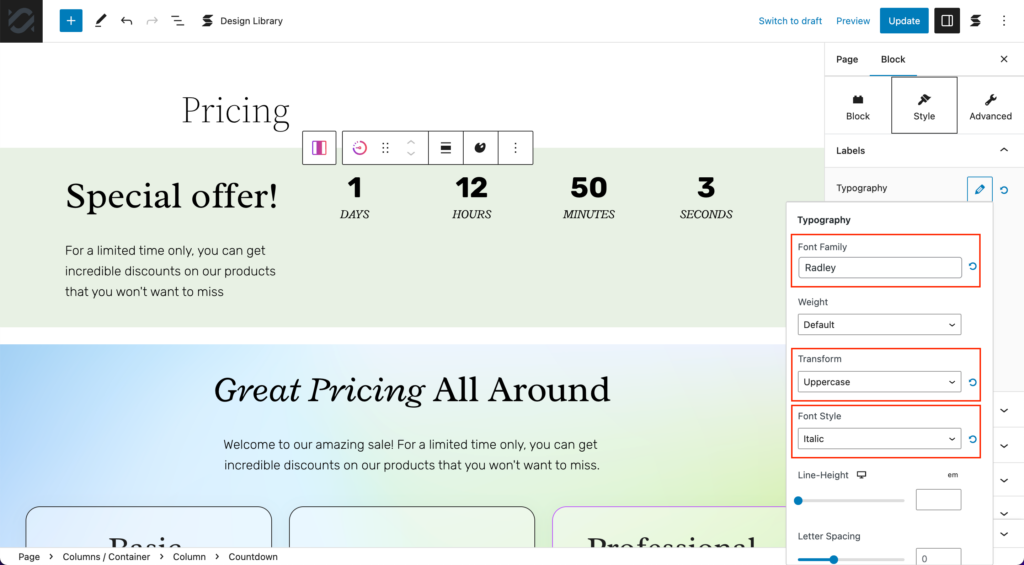
The next panel is called Labels. It is where we will be able to design how the labels under each number will appear. In the image below, we’ve set the typography to the Radley font, Uppercase transform, and Italic font style.
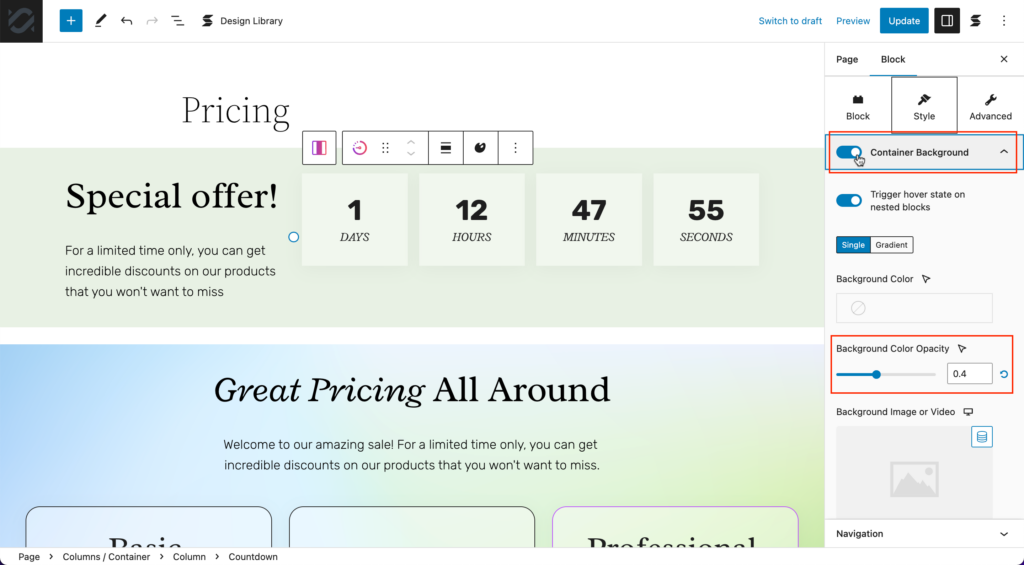
Next is the Container Background. We’ve clicked the toggle to turn it on and set the Background Color Opacity to 0.4. This will make the containers of each digit appear like the other containers in the page.
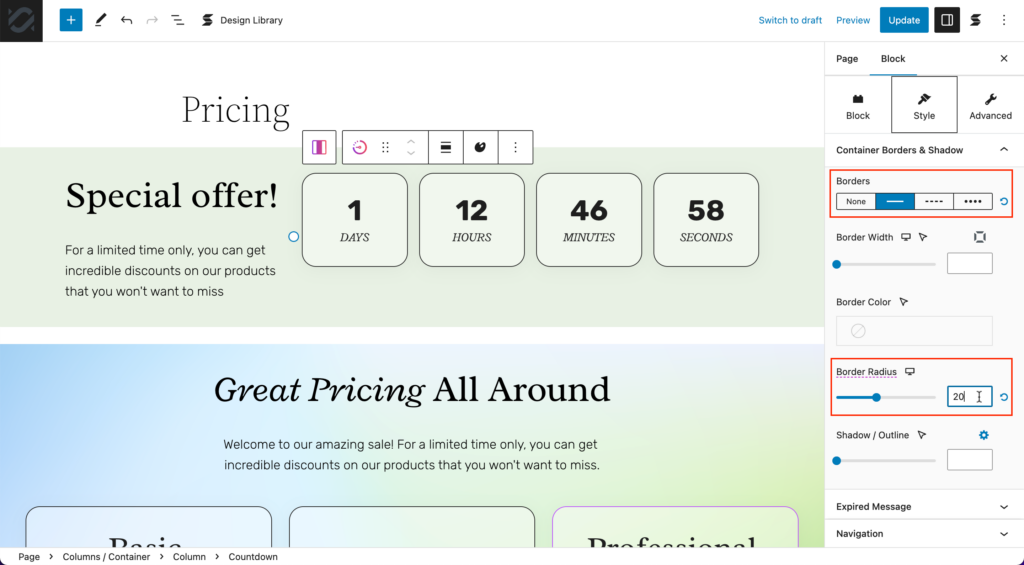
Now, let’s add some borders to finish the complete look of the containers. We’ve selected the Solid option in the Borders control and set the Border Radius to 20.
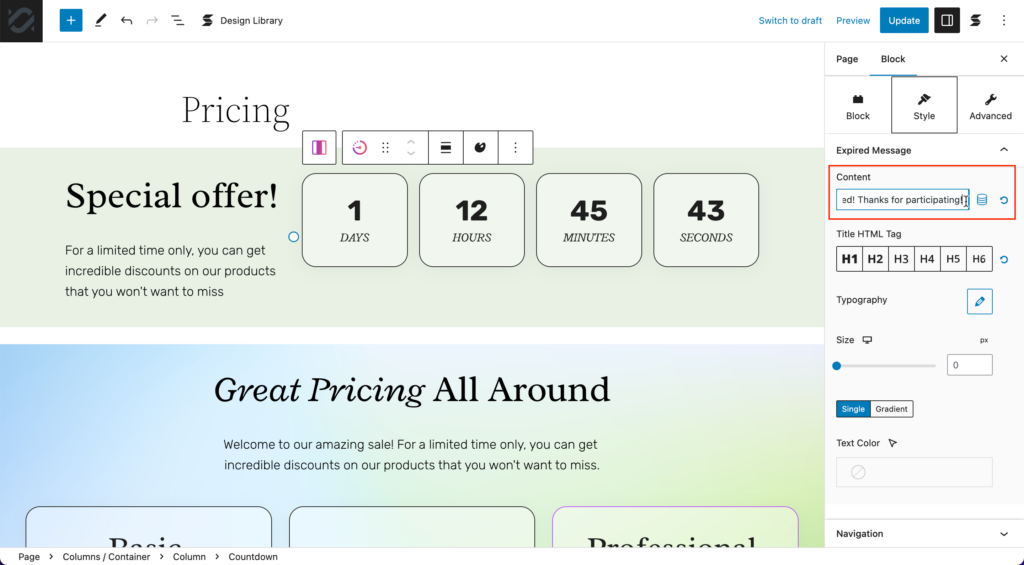
Finally, let’s add an expired message! We’ve added the text: “Sale finished! Thanks for participating!“
Now we’re done with our very own countdown timer section for this pricing page. Let’s see how that looks in the frontend.
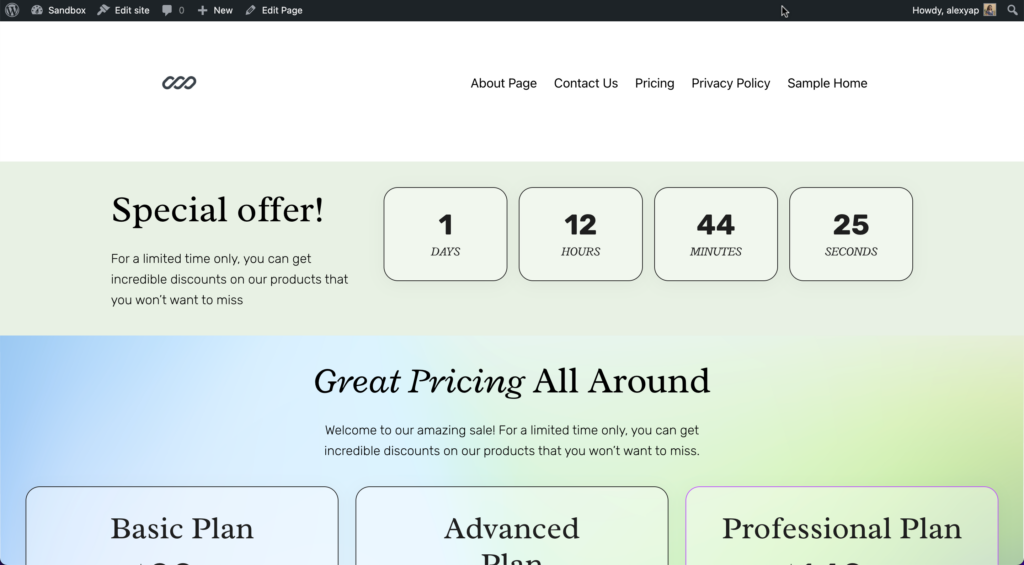
That looks great! We’ve covered all bases–we’ve placed it strategically, aligned it with the page’s goal/objective, and created a sense of urgency. Now, all that’s left is to just wait and watch as conversions and sales increase.
Conclusion
In conclusion, countdown timers can be a powerful tool for marketing campaigns. By creating a sense of urgency and encouraging customers to take action before time runs out, countdown timers can increase engagement, drive conversions, and ultimately boost the success of your marketing campaigns.
Whether you’re promoting a limited-time sale, a new product launch, or an upcoming event, a countdown timer can help to build anticipation and excitement, and encourage customers to act quickly. However, it’s important to use countdown timers strategically and sparingly, and to ensure that they are relevant to your campaign and your audience. When used effectively, countdown timers can be a valuable addition to your marketing toolkit, helping to drive results and grow your business.
If you want to create your countdown timers with Stackable, check out our features page to learn more about what you can do with our plugin!