Adding website animations is the latest trend in web design that you could use to your advantage. It creates a dynamic and flowing user experience for your website visitors and at the same time, it adds to your website’s aesthetics.
There are different ways to set up website animations. It could be as simple as elements moving as the cursor moves, or it could be objects appearing as the website loads. However, it’s easy to get excited with adding this feature into your website and unknowingly make the experience of your audience overwhelming. Before learning how to add animations, we must first understand how to use animations strategically.
What Are the Dos and Don’ts in Using Website Animations?
Adding animations to your website carelessly can pull you away from your goals. Here are some tips to make the most out of website animations:
Do test for responsiveness
Checking whether your animations are working properly from different viewports is an essential step that most people overlook. Sure it looks great when accessed from a PC or a laptop, but does it look good from a tablet or mobile device? We can’t completely disregard people who use mobile devices because, in fact, about 92.1% of internet users accessed the internet through a mobile phone!
Don’t go overboard
Use website animations in moderation. Don’t just add them for the sake of it. Remember, adding website animations should improve functionality on your website. When you add too much, it might be bothersome for your website’s audience. This could cause them to exit your website without spending enough time on it.
Do use animations for a specific purpose
Only use animations when you can justify it with a defined purpose. As an example, you could use it to trigger behavior, like clicking a button or call to action; or you could shift your website visitors’ attention to an element on your website!
So how can I add website animations on WordPress?
Now that you know how to use website animations strategically, let’s move on to how to add website animations on WordPress!
By using Stackable, you won’t need to know how to code to add animations to your WordPress website. You could wow your website visitors with simple to complex animations with just a few clicks.
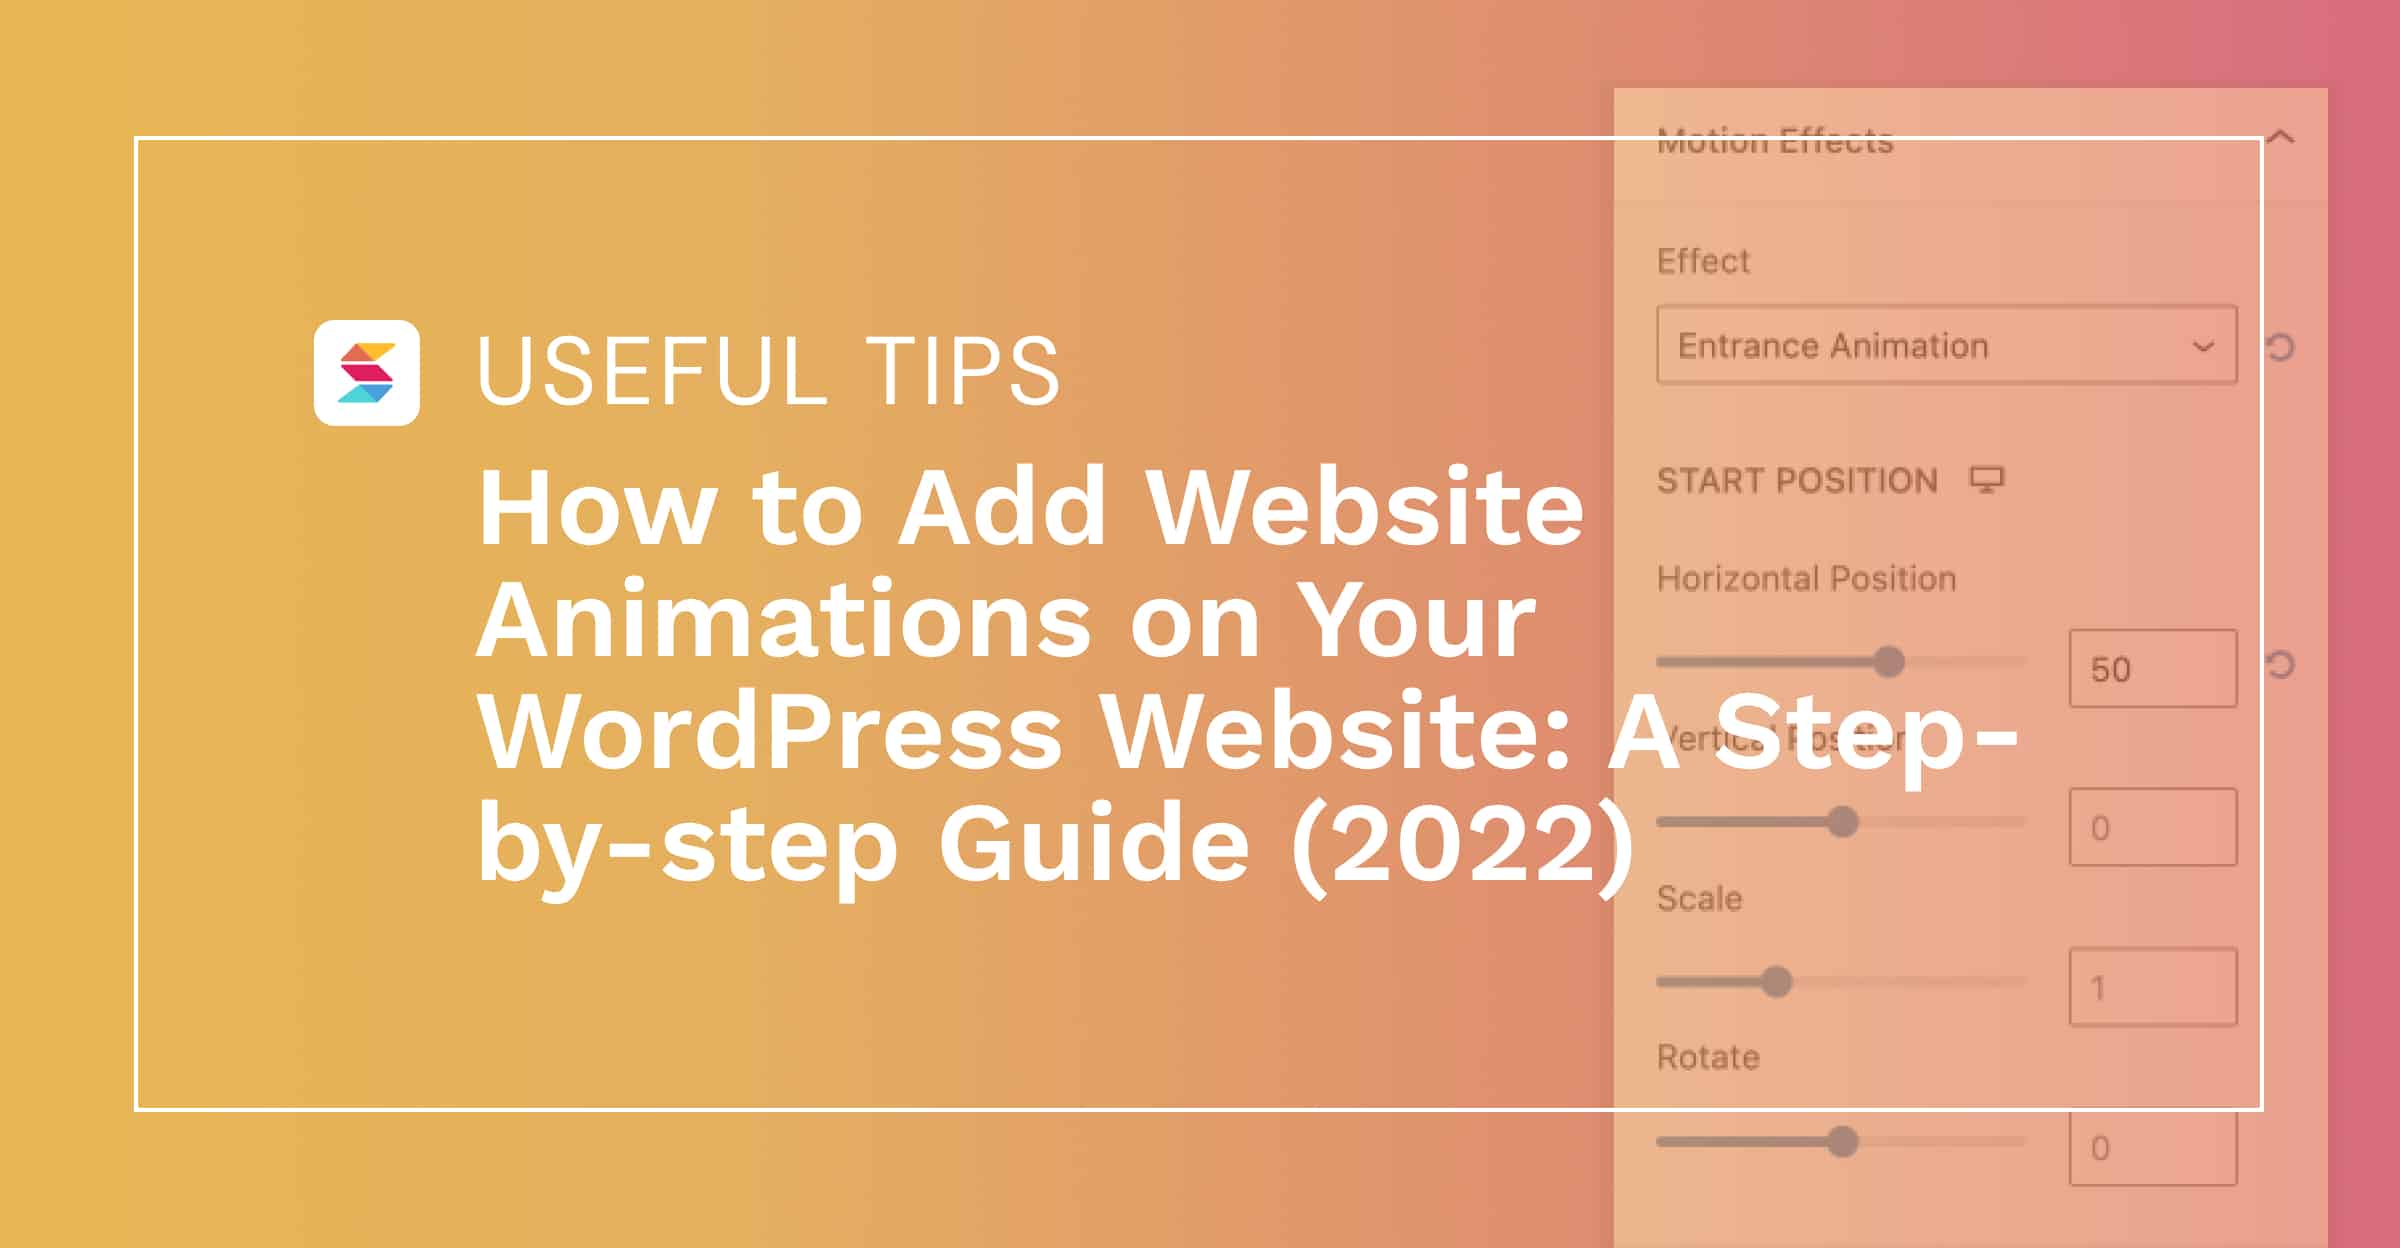
One of the ways you can create animations with Stackable is through Motion Effects. Here, we have a simple hero section for a website (This is actually from our Speck UI Kit). What we can do is create an animation that might make loading your website more interesting. This is called an Entrance Animation. What we did is we selected the right column, and navigated to the Advanced Tab of the Inspector. In the Motion Effects panel, we selected the Entrance Animation option and put in these values:

Note that we added the vertical position, this will give an effect like it’s entering from the sides of the screen. Now we’ll do the other column, but instead of adding the same value for horizontal position, we’ll put -50. These are just simple changes to the settings, but it elevates the design on the frontend by a lot. See how it looks:
We could also add Scroll Animations which are simple effects that you can add to elements of your website so that they could appear or move as the user scrolls through your website. Here’s an example:
To achieve this, all you will have to do is select the element that you want to blur and in the Motion Effects panel, instead of selecting Entrance Animation, select Scroll Animation. We achieved the above result by making the Blur setting 10 for the Entrance Animation and left everything as is.

You could experiment with these Motion Effects controls so you could achieve a truly unique motion effect on your website!
Next, we could use Stackable’s Transform & Transition to improve user experience. Here, we have three columns. What we’d like to do is to transform each column when the cursor is hovering over it. This will give your audience a visual motion of where they are navigating on your website.
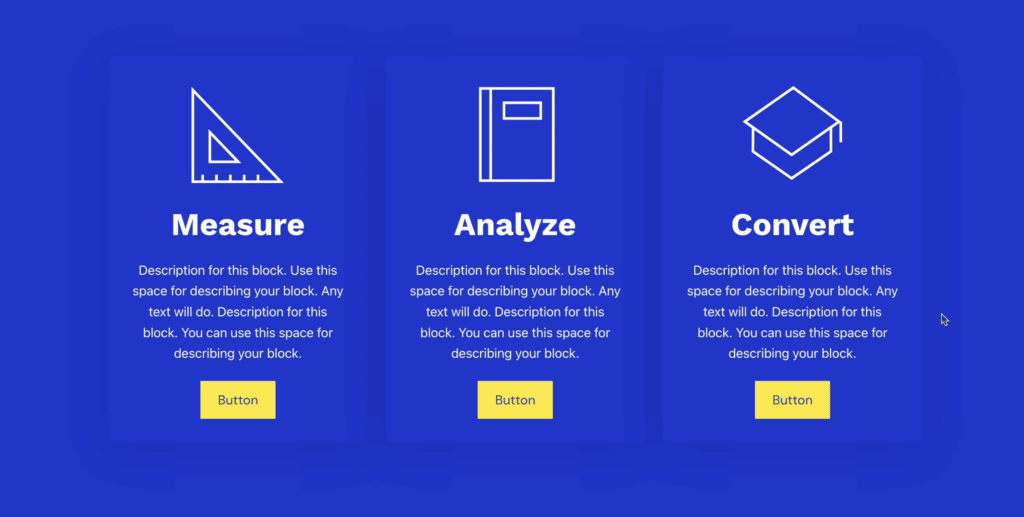
What we want to do is select one column at a time. Navigate to the Advanced tab of the Inspector, and there you will see the Transform & Transition panel. Just select this and you will see these design settings:

Select the Hover State icon beside Transform, and select the Hover State option. In the Translate Y setting, input -20. Do that for the rest of the columns so that when you’re done, you get something like this:
There you have it! That’s how you could create website animations using Stackable. These are very simple and minute details but definitely elevate the design from just static elements on your website.