
Last Updated on December 6, 2021
Version 3 is a makeover of Stackable based on all our learnings and the feedback of the community. This article will show you everything that’s new and what happens when you update.
We’re very excited to bring you this much awaited next iteration of Stackable. We’ve built Stackable version 3 almost from the ground up, applying all the learnings we’ve gotten from version 2 and from the community.
During the development of v3, we had the future in mind. So that when Full Site Editing (FSE) comes to fruition, we are ready. Version 3 is a solid foundation for our future
What’s the Major Difference Between Version 2 and Version 3 Blocks?
The most significant change in version 3 are the replacement of the old blocks. The new blocks are categorized into three types:
- Essential – these are all the basic blocks that you need to build your website
- Special – blocks that have special functionality
- Section – these are combinations of essential and special blocks that you can use to quickly build pages
These new blocks are meant to replace the old version 2 blocks. They work differently from before, but in a good way.
In the old v2 blocks, each block was meant to be a single self-contained section. For example, the Feature block already has a built-in heading, description and button. This was great since everything you need are already in the block, however it was quite limiting as well. Let’s say you wanted to add a checklist inside, or even just add another button, those weren’t at all possible with the Feature block.
In version 3, things work a little differently. Now everything is a block. So for the Feature block, it will contain a Heading, a Text and a Button block.
To better visualize this, here’s that Feature block with the List view open:
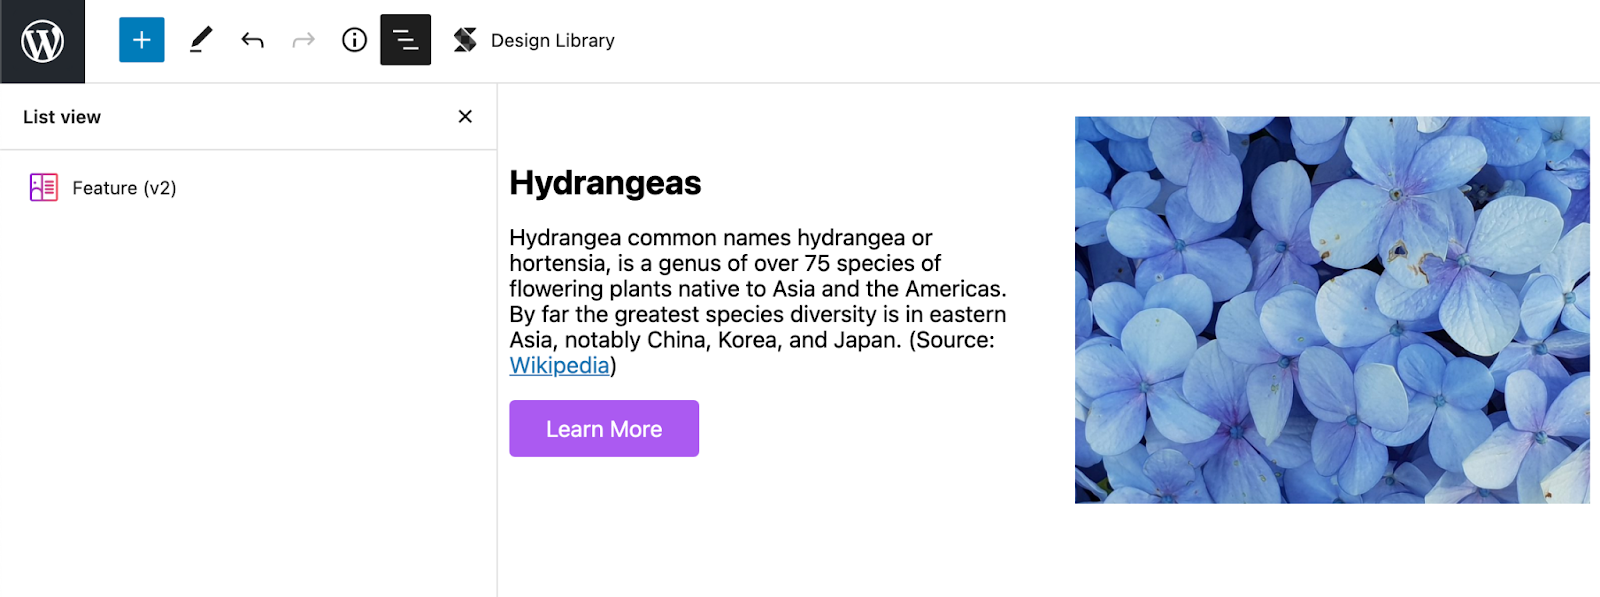
On the left side, you’ll notice that it only lists one block “Feature (V2)”.
Here’s the V3 Feature block and what it looks like with the List view:
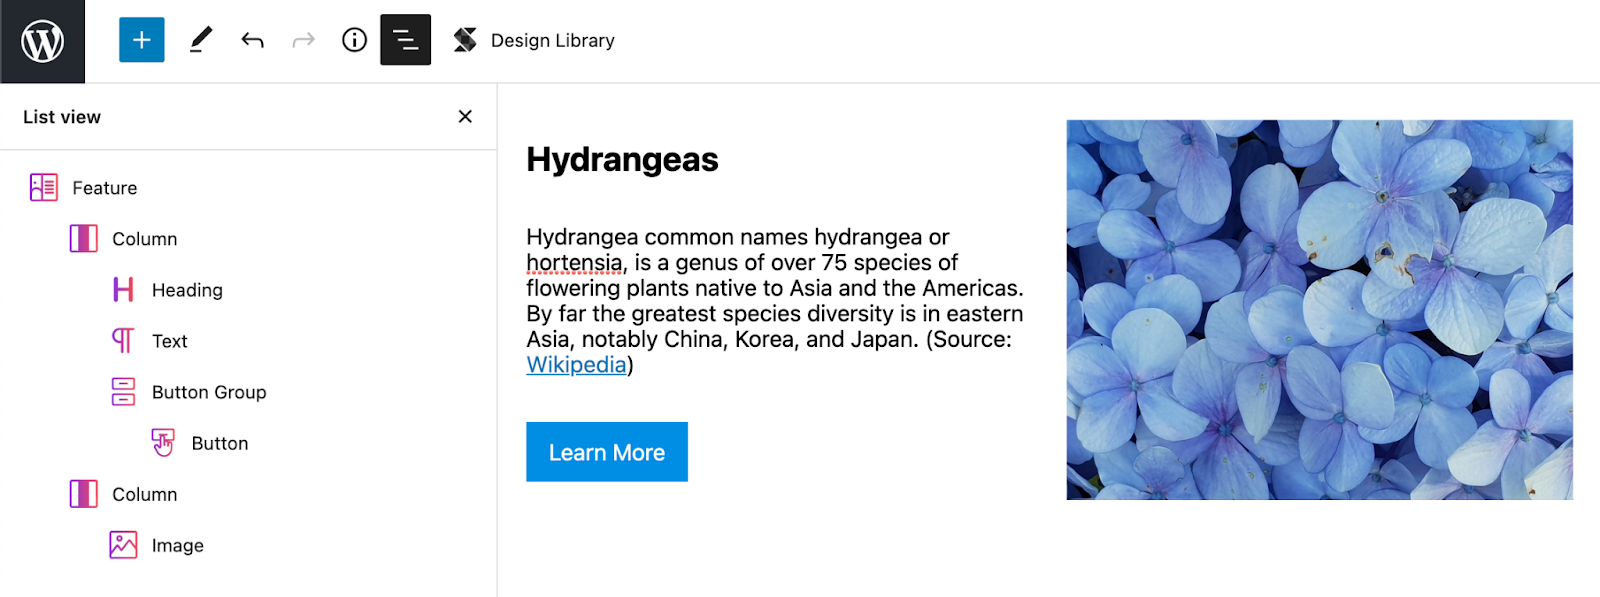
As you can see, the Feature block now contains a lot more blocks, while the Feature block itself still looks the same.
Everything Being a Block Changes the Whole Dynamic of the Building Experience.
Since the insides of blocks are now also blocks, you get all the benefits of blocks provided by the editor / Gutenberg. You can rearrange them, insert other ones between them, and you are in charge of what you want to place inside your blocks.
You might also notice that the “Title”, “Subtitle”, and other similar panels that the V2 blocks have been removed from the inspector. Those panels were only necessary before since there were no place for those settings. But now that Titles, Subtitles and Buttons are now blocks, those panels are no longer needed, and you can simply select each block to change their appearance.
Here are some things that you can now do that weren’t possible before:
- You’re no longer limited to having a maximum of 6 columns
- You can now adjust each column and their contents individually
- You can now nest any block inside containers
- You can now use copy and paste block styles (a premium feature) for all your content
We’d have to admit that this change brings with it a bit more complexity, since now things are more layered and intertwined with how Gutenberg works. But it shouldn’t take long to get the hang of things, and it would be apparent that there are huge benefits to this new system.
What Happens to v2 Blocks Now?
Stackable’s V2 blocks will still be there as long as you choose to load V2 blocks in the migration settings.
Additionally, all your pages that contain V2 blocks will remain the way they were and you will still have the ability to edit them. We will keep supporting the old blocks in the foreseeable future to make sure that they perform well in the frontend
Now we know what you’re thinking: won’t there be bloating if I have V2 and V3 blocks activated? Won’t it slow down my website?
Short answer: No. We care about your website’s performance so we made sure that styles and scripts that are not being used will not be loaded even with version 2 backward compatibility enabled.
What’s the Process of Updating From Version 2 to Version 3
If you have yet to update to V3, you will be prompted to choose among the three migration options. This allows you to transition your workflow smoothly to the new system:
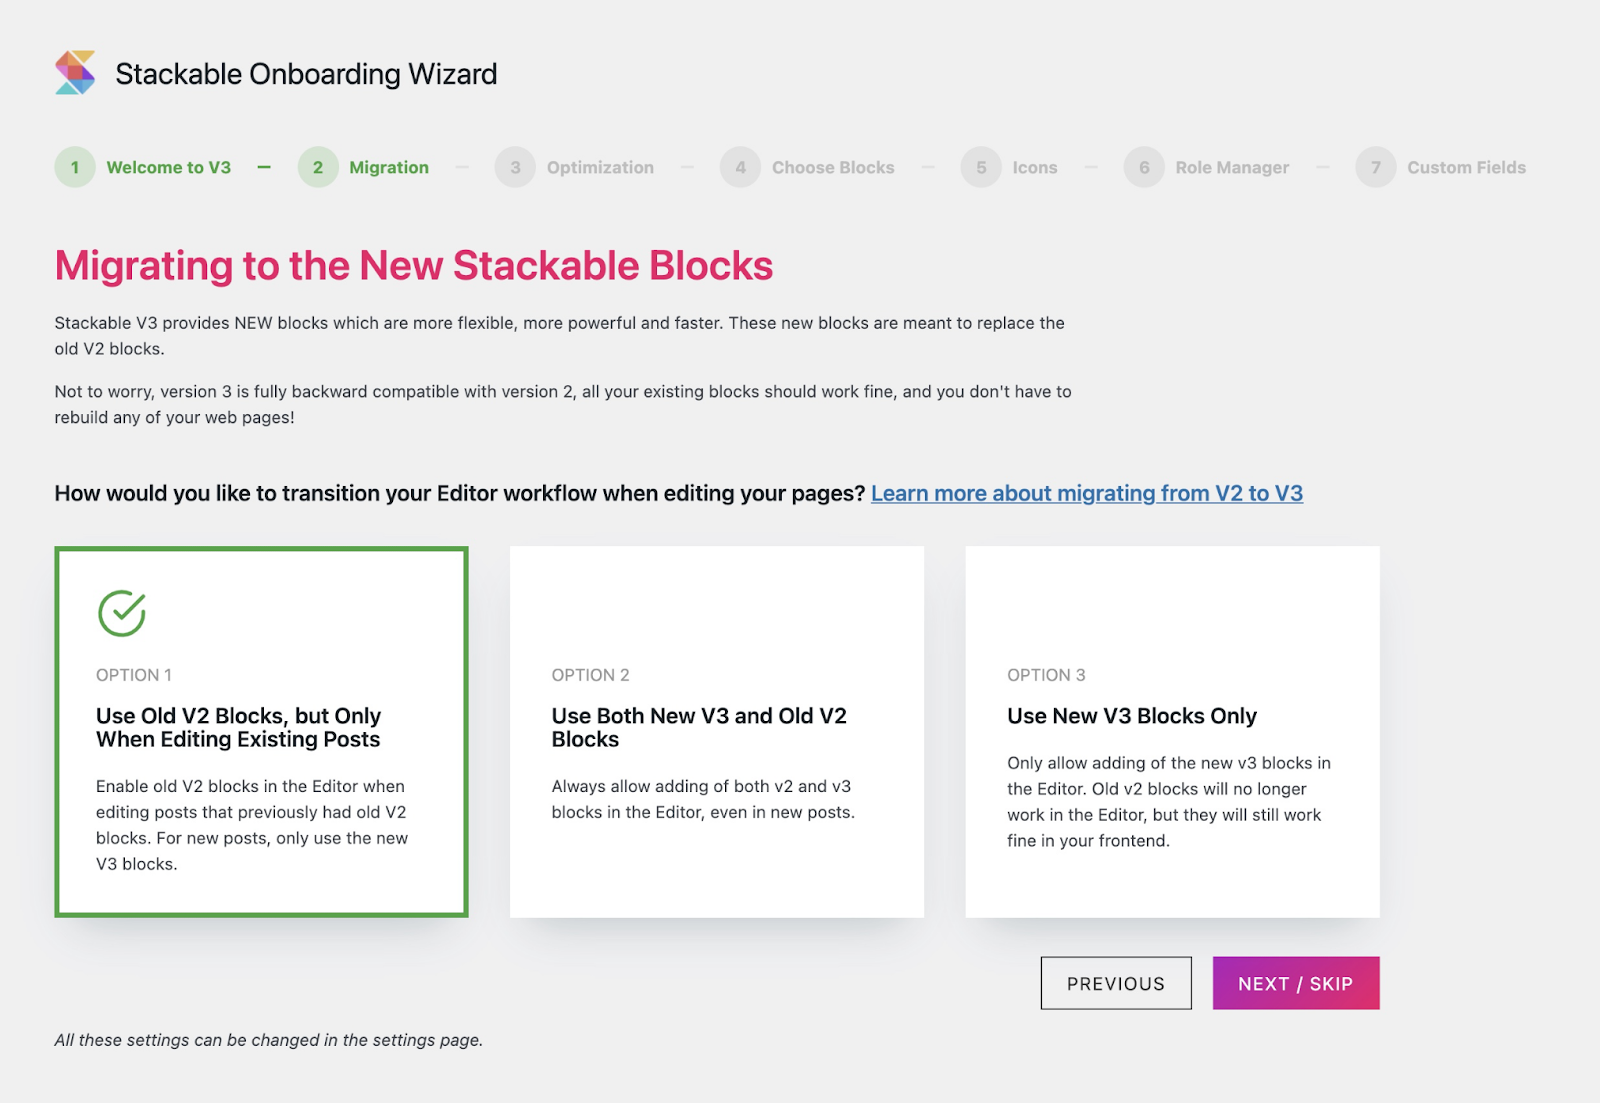
1. Use Old v2 Blocks, but Only When Editing Existing Posts
If you choose this option, Stackable will only add the version 2 blocks if you are currently editing any Posts or Pages that consist of version 2 blocks.
Whenever you edit your existing posts that have v2 blocks, you will be able to insert and edit v2 blocks. You will also be able to use v3 blocks alongside them.
When you create new posts/pages, you will then only be able to insert the new v3 blocks.
When to use this option? Select this if you have existing posts and pages which already use v2 blocks which you want to leave as-is, and for your future posts, use the new v3 blocks. Select this also if you’re using reusable blocks with v2 blocks that you plan on still using.
2. Use Both New V3 and Old V2 Blocks
If you choose this option, both version 2 and version 3 Stackable blocks will be added to your editor. It will not matter if you don’t have any Posts or Pages that use any version 2 blocks.
When to use this option? Use this option if you want to always use both v2 and v3 blocks across your entire site, even for new posts/pages.
3. Use New V3 Blocks Only
If you choose this option, the version 2 blocks will not be added to your editor and all of your Stackable blocks will be for version 3.
Note that if you have Posts or Pages that make use of version 2 blocks, choosing this option will not affect how it looks on your site. However, you will just not be able to edit them since the version 2 blocks won’t be added to your editor (they will show a block error, but this should have no impact in the frontend)
When to use this option? Use this option if you want to only use the new v3 blocks moving forward, don’t intend to edit your old pages or intend to rebuild them (remember, you don’t need to rebuild anything when upgrading from v2 to v3!)
Migration Settings in the Settings Page
In case you need to change these settings again in the future, you can access the Migration settings by scrolling to the bottommost part of the Settings tab in the Stackable settings page. This is how it looks like:
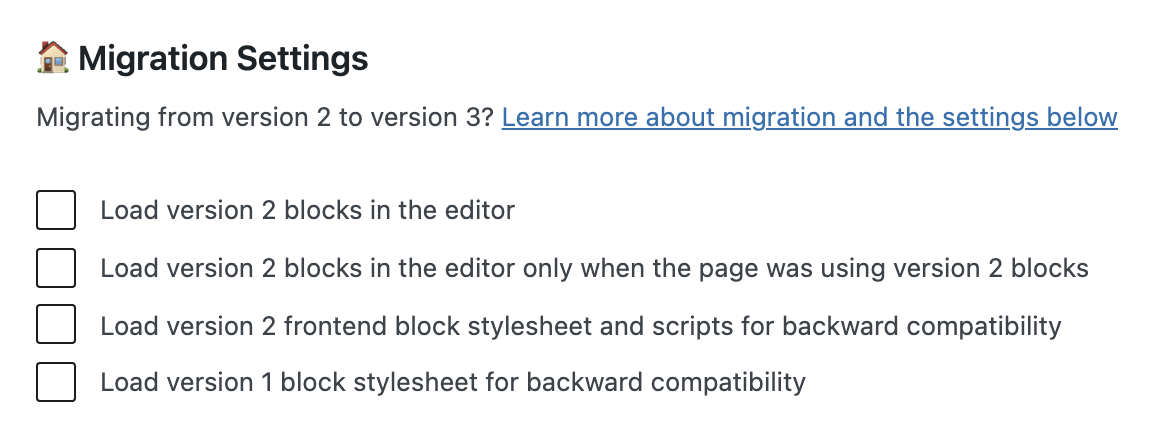
If you want to use only V3 blocks, simply deselect the options above.
Building With v3 Blocks (What’s Changed)
New Blocks
We’ve discussed earlier that now in version 3, almost everything is now composed of a block.
Adding blocks is the same. But now you can nest blocks
Here’s now what a Feature block’s structure looks like:

The workflow in editing a block has slightly changed from v2.
Here’s a table that enumerates the differences in how you style blocks:
| The action you want to do in a block | Before in Version 2 | Now in Version 3 |
|---|---|---|
| Styling the title of a block | Open the “Title” panel in the inspector and edit the title’s options | Click on the title block and adjust the inspector options |
| Removing or adding the title of a block | Toggle on/off the “Title” setting in the inspector | Delete the title block, or add a new Heading block |
| Adding something that’s not included in the block. For example, using a bullet list instead of text inside the Feature block | You can’t do it | Just add a new block |
| Rearrange the content | You can’t do it | Move blocks up or down |
| Adding more columns of a block | Slide the columns option in the inspector (for blocks that support it) | Add the block in a Columns block, and slide the columns option in the inspector (or duplicate the Column block) |
| Styling multiple columns simultaneously | All options get applied across all columns | Duplicate the block, orUse the copy and paste styles button in the toolbar, orEnable block linking on the top right corner of the Column block when styling (block linking is a beta feature that you need to enable) |
| Rearranging columns | Click and drag the column changer option in the inspector | Move the column block left or right using the toolbar |
| Picking layouts | Go to the Layout tab and choose a layout | Add a block, then pick a layout (we’re adding a way so that you can re-pick a layout easily soon) |
One of the things we loved about version 2 was how easy it was to just toggle on and off something in the block. We wanted so much to bring this functionality into version 3, but since everything is now a block, it wasn’t possible anymore.
A New Inspector
We’ve completely reimagined Stackable’s design options in the inspector. Instead of the Layout, Style, and Advanced tabs, they are now Block, Style, and Advanced.
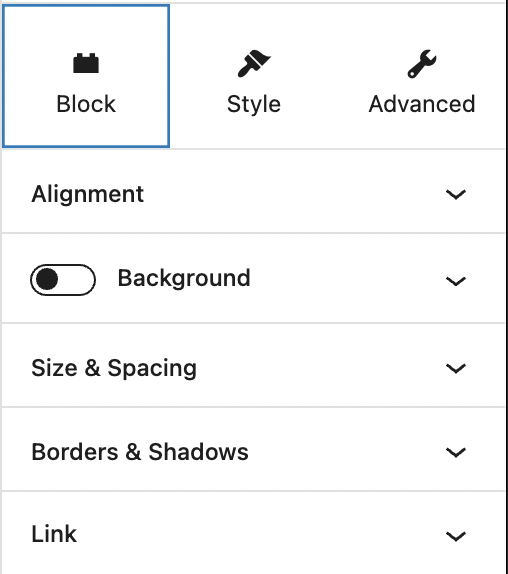
Here are some of the highlights in the new inspector:
- You can add backgrounds, shadows, borders, links to any block
- In range slider controls, you can now type in values which are past the slider minimum and maximum values. For example, the range of the border radius slider is from 0px to 50px, but in the text field, you can type in 100px so you can have more control over its value.
- Most inspector options now have a reset button
- Some inspector options have hover toggle buttons, toggling the hover button will allow you to style what blocks look like when they’re hovered on
- Nested Blocks can also be styled when their parent container is hovered on to achieve elaborate interaction animations
The new layout picker
Previously, there was a layout picker inside the inspector. We felt that while this made things easy to switch between designs any time, most of the time once you had picked a layout, then you would normally stick to it and continue to style it. This meant that a third of our inspector wasn’t really used most of the time.
We pulled it out from the inspector and instead it’s presented once you insert a block.
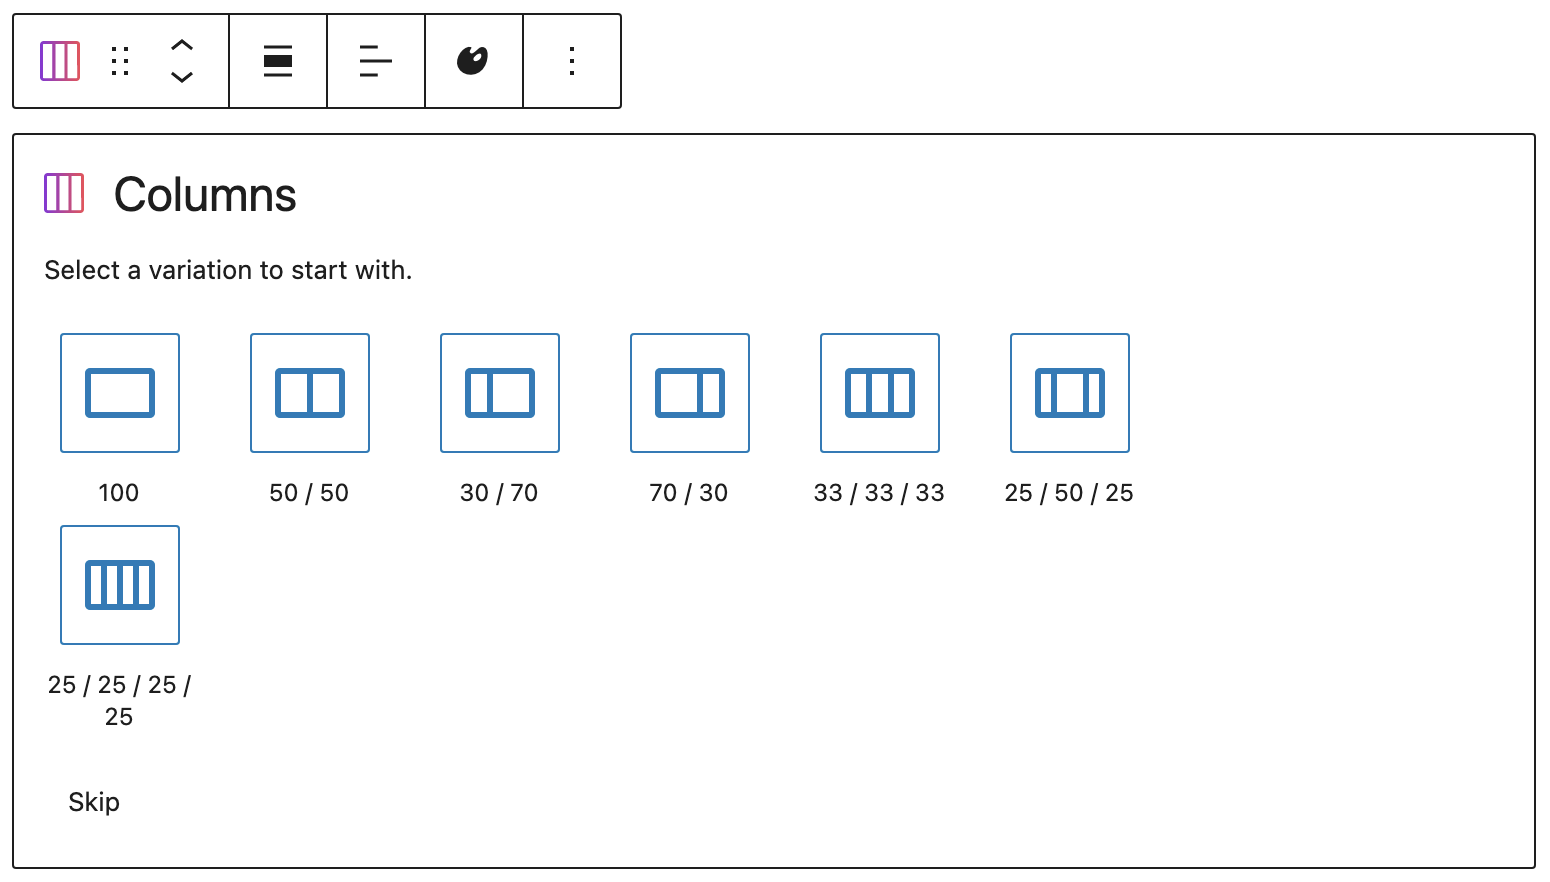
You can select the layout you want upon adding a block with a column. These are:
- Hero
- Feature
- Feature Grid
- Card
- Team Member
- Call to Action
- Pricing Box
- Testimonial
- Image box
- Pricing Box
- Notification
- Posts
- Accordion
- Blockquote
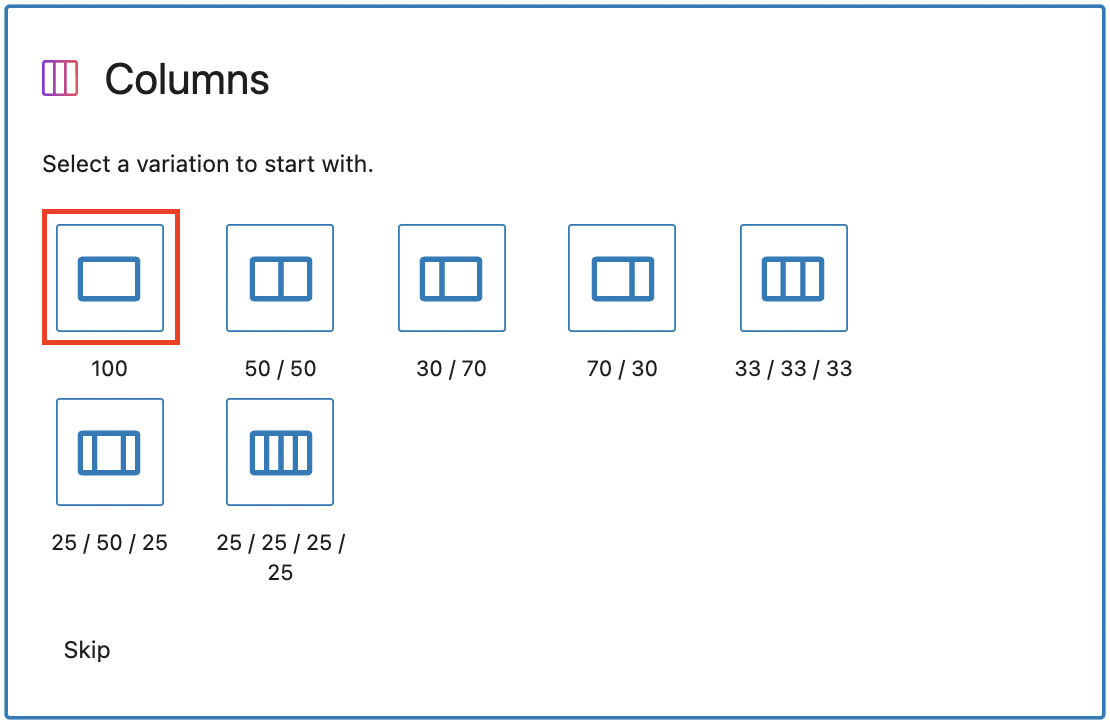
A Powerful Columns Block
We’ve significantly improved the Columns block. Before, you were limited to only 3 or 4 columns, but now, you can have any number of columns and rearrange them from left to right.
The new Columns block also replaces the old Container block – just insert a Columns block and pick the 1-Column layout. This makes things easier when you change your mind and choose to use multiple columns instead since you can create new columns any time.
You can adjust the columns visually by dragging the sides of columns. Dragging columns snap at common widths: 25%, 33.33%, 50%, etc. (An extra tip: holding shift will snap at 10% increments). You can still manually enter the percentage value of a column width by clicking on the column width label of columns.
We’ve also added a new Block Linking feature where you have the ability to link or unlink columns. This is still in beta so if you want to try it out, you will need to turn it on in the settings. Linked columns will inherit the design options of one column (even the inner blocks). Check out how Block Linking works here.
Be mindful that like the Native Columns Block, Stackable’s Columns block contains Column blocks in it. This structure is part of why the Columns block can do so much more than before.
Responsive Columns
You can specify how columns collapse or not collapse in tablet and mobile. You have full control over how your columns collapse.
If you have a 4-column layout on a desktop, you can turn it into a 2-column layout on tablet and mobile. It’s completely up to you.
You can achieve this by previewing the editor in tablet or mobile, then simply drag the sides of your Column blocks to resize.
To Cap Off
After 10 months of brainstorming, development, and testing, we are so glad that we are finally able to present Stackable V3 to you. This would not be possible without your continuous support and feedback, and of course, our team’s hard work!
We hope that you enjoy using V3 and we are very excited to see what you are able to create with it. As always, it’s a pleasure to hear from you, so just contact us through our support channels, or through our Facebook community.
Frequently Asked Questions
I’m Seeing the Block Error “Your Site Does Not Include This Block”
Don’t panic! Just proceed to the Stackable settings in your WordPress admin to adjust your Migration settings.

We have three migration options for you to choose from.
- Use V2 blocks when editing old posts, and V3 when creating new posts
- Use both V2 and V3 blocks
- Only use V3 blocks
Please make sure that in your migration settings, you have either of the first 2 options selected.
If you’re still seeing the errors, set your migration setting to load the v2 blocks always
What Happened to the “Title”, “Subtitle”, “Button” Panels in the Inspector, They’re Gone.
The “Title”, “Subtitle”, and other similar panels have been removed from the inspector. Instead of those being a fixed part of the block, each are now individual blocks.
So in a Feature block for example, it now has a Heading block, a Text block and then a Button block.This allows for more flexibility, so you can add (or remove or rearrange) anything you want – even add an icon list, or columns inside, add other blocks, it’s now up to you.
Will I Have to Rebuild the Pages That I Built Using V2?
No you don’t, you can keep them as is
We will keep supporting the old blocks in the foreseeable future to make sure that they perform well in the frontend
Will Keeping My Older v2 Blocks Slow Down My Website?
No it won’t. If you turn on the optimization setting available in v2 (the wizard should prompt you about it, if not you can turn on optimization settings in the settings page) V2 scripts and styles will only be loaded for pages that use those blocks.
Where Do I Find the Migration Settings?
If by chance the migration/onboarding wizard did not shore up, you can navigate in your admin to Settings > Stackable, then scroll to the bottom of the settings page.
Where Are My Old v2 Blocks, How Can I Still Add Them?
The old blocks are now labeled as version 2 blocks (you can still use them)
Change migration setting at the bottom of the settings page to option 1 or 2
Where Is the Container Block?
The container block has been replaced with the Columns block, now you can use a 1-column Columns block. And if you change your mind and need more columns, you can just duplicate your column block to create 2 columns!
Why Is My Design Library Only Showing a Few Designs?
Right now we are still working on migrating the designs, but they should be available in the coming days.
Why Doesn’t the Motion Effects Seem to Work in All Devices?
If the device has a Reduced Motion accessibility feature turned on, Motion Effects would automatically be disabled.
Where Is Feature X That Was Present in Version 2?
Our intention is to retain all features and capabilities present in version 2 as much as possible. If we’re missing something, rest assured that we will be adding it back.
Thank you, Benjamin, this is a concise and informative write-up. When using V2, my biggest challenge was remembering where all the options were, since the list of options could be very long and deeply nested for some blocks. Version 3 solves this problem in a simple way and offers additional benefits. I tried all the major block builders before I settled on Stackable as I found it to be the most well-thought-out and best coded of all the major block builders. Version 3 raised the bar even higher. Great work Team Stackable.
Where are the layouts located?
Hi Marcel! The layout picker will pop up once you add a block. Please see here the list of blocks that include the layout picker: https://wpstackable.com/blog/how-to-shift-from-version-2-to-version-3/#layout-picker
Hope this helps!
Overall, I love the changes. However, when I’m using a background color, most of the time I want to set it to full width. Now, I can’t figure out how to set a block to full width.
Hi Kara! You can click on the alignment option on the block’s toolbar to set it to full width. If this doesn’t do it and you’re still having issues, could you please send us a ticket at support@wpstackable.com with your login details so that we can further investigate this issue? Thank you! 🙂
This is clear, but doesn’t address the question of whether it’s possible to convert existing v2 blocks to v3 blocks.
Hi Sallie! We hear you. Right now, we don’t have plans on creating a converter to convert V2 blocks to V3 blocks because the new blocks work very different from the old ones. Although you should be able to leave those v2 blocks as-is and they should just work as normal.
Sorry, I meant where is Feature (v2) Display a product feature or a service in a large area.
Thank you
You can make your blocks full width from the toolbar. If the block doesn’t have this, you can wrap it in a Column block and then make that full width. You can also change the height of the blocks if you need it to cover a larger area.
In checking my homepage with Lighthouse, I sometimes see references to deprecated_v2_premium_only stackable blocks in the ‘eliminate render-blocking resources’ report area. Will converting from v2 to v3 blocks improve this at all?
Hi Jennifer! This can be fixed by optimization plugins. That existed in V2 blocks, but we’ve addressed it in V3 blocks. So yes, converting the blocks should also fix it.
I’m trying out the new column block (replacing the container). One thing we previously used was rounded corners – I can’t find this option in the new column block?
You can find it in the Borders & Shadows Panel inside the Block tab or the Style tab